Saturday, December 28, 2013

Drunken Stampers #156 Person: Marilyn Monroe

Hello and good morning! I hope you all had a very Merry Christmas and that Santa gave you everything you wished for! LOL!

It's a new week at the Drunken Stampers challenge blog. This weeks person/place/thing challenge is a person - Marilyn Monroe! (or you can use the sub theme and make something with glam or glamorous!)


My team the Tropical Hooters are up to inspire you this week! Here's what I dreamed up:


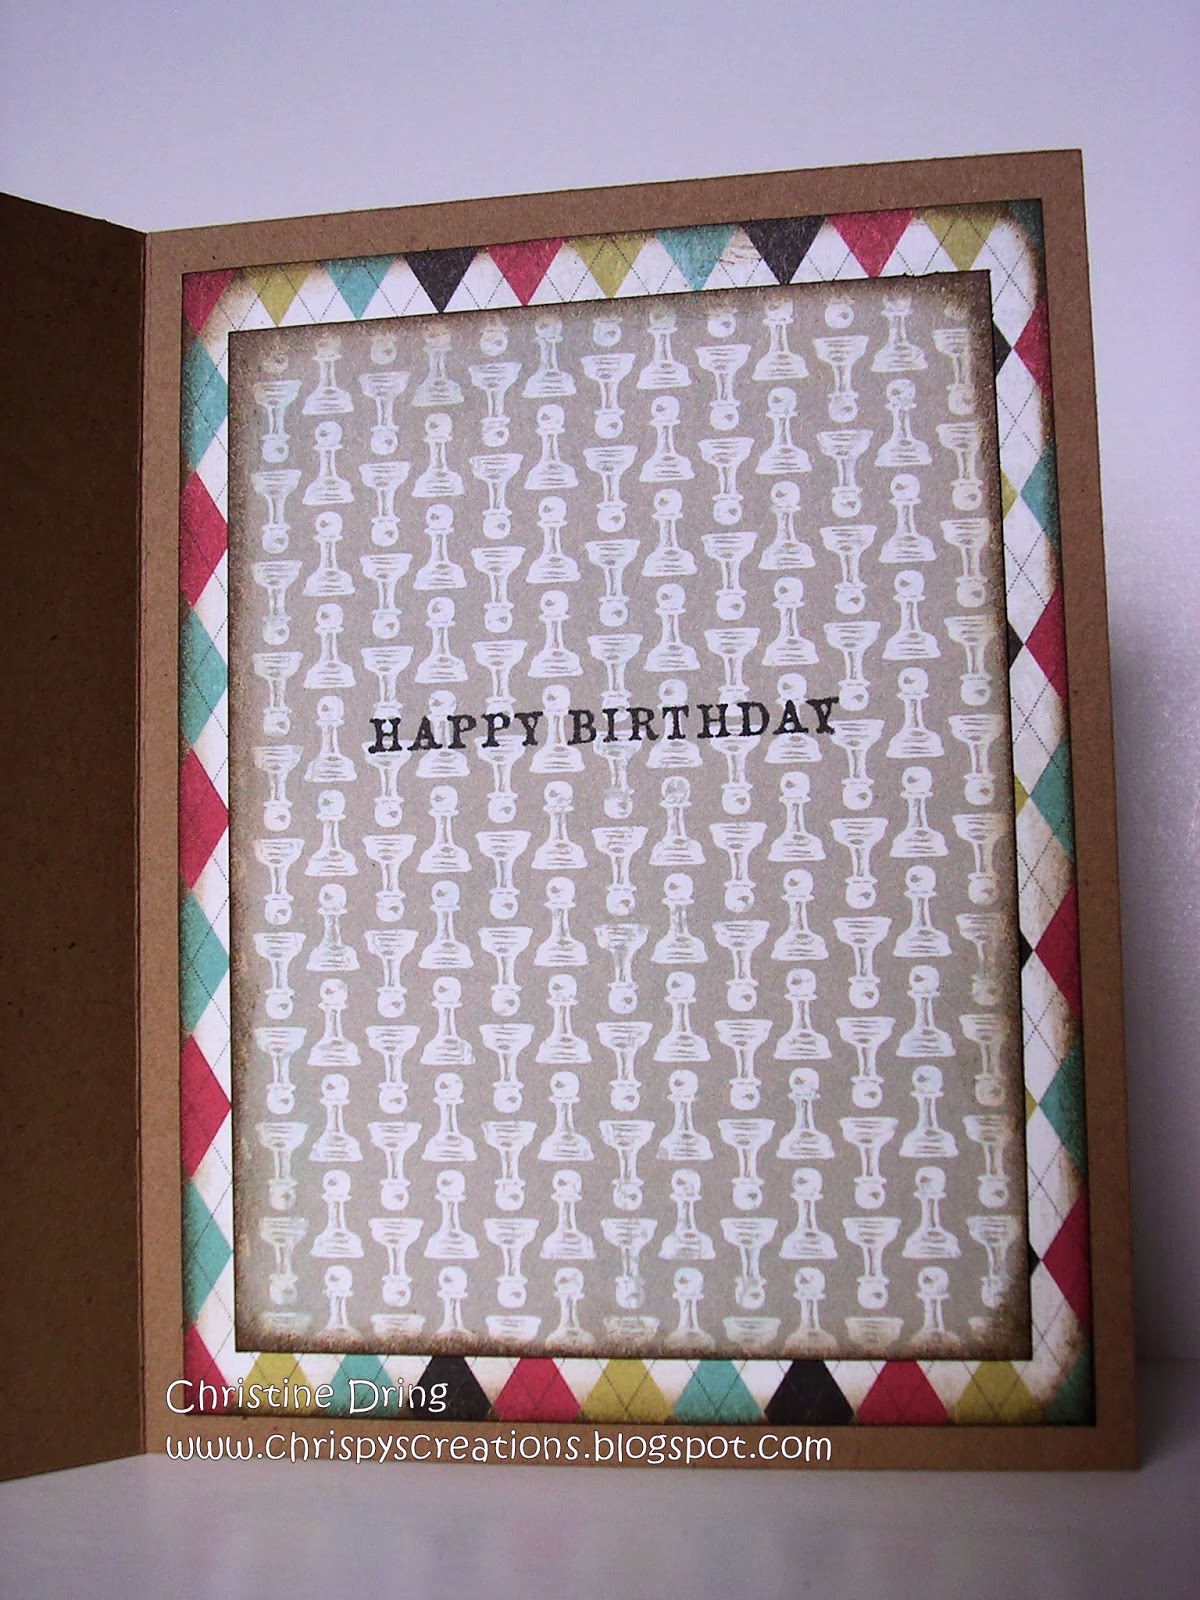
Clip Art to the rescue! Again! A bit of glitter paper, some rhinestones, and a printed quote make for an easy card! And look at it sparkle! LOL! You may have noticed that there is no picture of the inside. That's because I haven't finished it. (a rarity for me!) I'm not sure if this will be a graduation, a congratulations, or a just because card. I'll figure it out. Sometime. ☺

That's it for me! Please make sure to see what my teammates dreamed up for your viewing pleasure over at the Drunken Stampers blog! Thanks for stopping by and stay crafty my friends!

Chris
Supplies:
American Crafts - glitter paper
CS: Recollections
Accessories: Clip Art and sentiment printed from internet; Grand Calibur; Labels One Nestie; Recollections - rhinestones; Berwick - tinsel cord
Adhesives: SA by 3L - MyStik permanent, 3D foam squares; Glue Dots; Recollections red tape

Tuesday, December 24, 2013

Secret revealed!

I have happy news to share! I was invited to be one of the new design team members over at Shopping Our Stash! I'm so excited!


My term will start in January, but why not play along with their current challenge: #131: Use one color on your project. This is a great blog, as it challenges you to actually USE your stash!! All paper craft hoarders welcome! LOL!

Happy Happy Joy Joy!

Chris

Monday, December 23, 2013

Oh Ship!

Ok, so yes, the last couple of posts have been about belated birthday cards. It's December. Christmas approaches. We've had a medical crisis with a family member. I wasn't focused and missed birthdays. It happens. At least I didn't lose my sense of humor. Here look, see:


Here's the inside:

Punny sentiments? Oh, hell yes please! LOL! I'm a firm believer in the "humor is the best medicine" theory. Plus, my family is just as nuts as I am (apple. tree.), and my nephew, for which this is intended, will get a kick out of it.

Anyhooo, that's it for me. I'm not sure I'll be blogging the next couple of days. Christmas is upon us. So, just in case, I hope that you and your family have a very Merry Christmas! Enjoy!

Chris
Supplies:
Stamps: Paper Smooches - Wicked Nauticool, Birthday Sampler
Ink: Memento - Rich Cocoa; Ranger DI - Walnut Stain
DP: MME - Indie Chic
CS: Darice; Recollections
Accessories: Grand Calibur; Paper Smooches - Border 1 Dies; Making Memories - Alpha stickers
Adhesives: SA by 3L - MyStik Permanent, 3D Foam Squares; Elmer's extra strength glue stick; Glue Dots

Sunday, December 22, 2013

Ah Crap!

Another stellar post title! LOL! Ok, this is really going to be short and sweet. The challenge I'm using ends in less than two hours. (I'll never learn! HA!) I apologize for the, ahem, crappy, pictures. It's dark out now so I just went with the flow. (OMG! Punny bathroom humor! I just kill myself! Buahahahaha!)


Here is the inside:

I'm using the (almost not) current sketch from Tuesday Morning Sketches #229. I keep forgetting about this cool challenge blog. (Any chance you can add a "subscribe by Bloglovin" and/or by email on your sidebar? That would be awesome!)


Ok, so back to my card. Yep, totally used the chalkboard technique to stamp a toilet and plunger. LOL! I have a very twisted sense of humor. I make no apologies. (wink)  I doodled the lines and dots with a white Prismacolor pencil, then went over the dots with a blue pencil. The heart was colored in first with the white then colored over in the red pencil. (Otherwise, if you use the colored pencils directly on the black card stock, you won't see them hardly at all. A tip, from me to you!) On the inside, I masked part of a sentiment stamp from Unity's December 2012 KOM, the rest is from a tiny set by Lawn Fawn.

That's it for me. Got to get some dinner started for the hubby and myself. Thanks for stopping by and have a great evening!

Chris
Supplies:
Stamps: Unity - Ah Crap set, December 2012 KOM; Lawn Fawn - Year Two set
Ink: Clear Snap - Frost White; Memento - Tuxedo Black; Ranger DI - Walnut Stain
DP: October Afternoon - 9 to 5
CS: Recollections
Accessories: Prismacolor pencils; Fiskars border punch; heat gun
Adhesives: SA by 3L - MyStik permanent, 3D foam squares


Hey Stud....

How's that for a blog title! Buahahaha!

I have to try and make this a quick post before the hubby comes back from the driving range. This is his birthday card and I don't want him to see it yet!


the inside:

I really wanted the playing cards paper as my background to go along with the hey stud sentiment. (See what I did there? Hey stud - 5 card stud? A card game. Get it? Anyone? Bueller?) Ok, well the association game I may not be good at, but when I was making this card last night, I thought it was a brilliant idea. I also may have been into my second glass of wine by then. Just sayin'. (wink)

I used the (just about not) current sketch from Mojo Mondays #324. (Procrastinate? Me? Say it ain't so!)


Thanks for hanging out with me. And now I must go and hide this card! Have a great day!

Chris
Supplies:
Stamps: Unity - Hey Stud Itty Bitty; July 2012 KOM
Ink: Memento - Tuxedo Black; Ranger DI - Walnut Stain
DP: Carta Bella - Well Played
CS: Recollections
Adhesives: SA by 3L - MyStik permanent

Friday, December 20, 2013

Party Time....

Hi there and happy Friday! Just wanted to pop in to share a card I made for one of my nieces. I'm using the sketch from CAS(E) this Sketch #58, and, since I got my bling on with this card, I'm entering this in the current Simon Says Stamp Wed. challenge - Bling It On:


Here is the inside...


Glitter paper, rhinestones, and sequins. Can't get much more blingy than that! LOL!

Now I'm off to wrap presents and get some last minute cards made. Thanks for stopping by! Have a great weekend!

Chris
Stamps: Paper Smooches - Birthday Sampler; Borderlicious
Ink: Memento - Tuxedo Black; Lady Bug
CS: Darice; American Crafts Glitter paper
Accessories: Grand Calibur; Paper Smooches - Drink Glasses dies; Recollections - rhinestones; Nicole Crafts - sequins; Fiskars corner rounder
Adhesive: SA by 3L - MyStik Permanent, 3D foam squares; Glue Dots; Helmar 450 glue


Monday, December 16, 2013

Winter Wonderland....

Good morning crafty peeps! I hope you all had a great weekend! I finally got the rest of my Christmas decorations up, saw the new Hobbit-2 movie, and got some house cleaning done. (If you know me, housework is NOT my strength. So it was a personal victory for me. LOL!) I also made more cards. Here's one of them:


Here's the inside:

I've challenged myself to use more scraps, stamps that have never seen ink, and embellies that I keep hoarding. I did pretty good with this card. Even used both of my die cutting machines! (Slice and Grand Calibur) I cut the snowflakes from three colors of card stock with the Slice, then cut the circles with the GC. After gluing the green strip, I adhered the circles and snowflakes, switching out the colors. I was originally going to put rhinestones in the center, but remembered that I had these wooden snowflakes. Out came the mists and Shimmerz! When they were dry, I glued them with Helmar 450 adhesive. (Those bad boyz ain't going nowhere! HA!) I stamped the sentiment in the corner, and another simple sentiment finished the inside.

I've used the sketch from CAS(E) this sketch #57, the colors from Color Throwdown #272, and the 'Let it snow' themes for CAS-ual Fridays #123 and Simon Says Stamp Wednesday challenge.


Thanks for hanging out with me and I hope you have a great day!

Chris
Supplies:
Stamps: BoBunny - Holiday Wishes
Ink: Memento - Gray Flannel
CS: scraps
Accessories: Grand Calibur; Std. Circles Small Nesties; Slice die cut machine and Noel cartridge: Recollections - wooden snowflakes; Tattered Angels Graphite Glimmer Mist; Maya Road Mist - Eggplant Purple; Shimmerz Pearls - Blue By You; Q-tip
Adhesives: SA by 3L - MyStik Permanent; Helmar 450

Sunday, December 15, 2013

Merry Kissmoose....

Hello again. Here's another card I made last night. Yes, the design is very similar to the one I just posted, just changed up a little.


Here's the inside:

I liked this super simple design so I made another card with it. Both sentiments are heat embossed and I rounded one corner of the card. This time I stamped, colored, and fussy cut the moose. He's popped up on the popped up banner. I also added a pearl to his hat and gave him googly eyes. (Gotta love a googly eyed moose! HA!)

I'm entering this one in the Paper Smooches Sparks - Anything Goes challenge.


Ok, I'm done for now. I have more cards to make. (That always helps, since I have to mail them out still!) Thanks for hanging out with me. I hope you have a great day!

Chris
Supplies:
Stamps: Paper Smooches - Chubby Chum Pals; Joyful Greetings
Ink: Versa Mark; Ranger DI - Vintage Photo
DP: MME - Signature Christmas
CS: Bazzill; Copic X-Press It
Accessories: Grand Calibur; Paper Smooches - Flag Tag dies; Spectrum Noir markers; Stampendous - White EP; heat gun; Prima - pearl; Nicole Crafts - googly eyes; Fiskars corner rounder
Adhesives: SA by 3L - 3D foam squares; Helmar 450 adhesive

Believe in the Magic....

Hello my friends! I hope that you are having a relaxing weekend! Yesterday, Andy and I went out to lunch then went to see the second part of the Hobbit movies. In 3D. I swear there were a few times I almost jumped in his lap from some of the scenes! THAT'S a good sign of a great movie! LOL! If you are SciFi geeks like we are, then you will love this movie! The only thing that sucks is that you have to wait until next year for the last part of the trilogy to come out! LOL!

I still needed to make more Christmas cards, so here's one I made last night:


Here's the inside:

It's really CAS, but I like it. I stamped and embossed the sentiments on both the front and inside. I die cut the banner and adhered with foam squares. Then I added those teenie tiny rhinestones under the sentiment. One at a time. I might have gone crossed eyed for awhile after. ☺

Hey, look at that. I used Paper Smooches stamps, so I'm going to enter this for the Sparks - Anything Goes Challenge!


(Did you see Savannah's card? It's absolutely brilliant and I may have to case it! LOL!) I have another card to blog about so grab a cuppa and stick around if you can. Thanks for stopping by and stay crafty my friends!

Chris
Supplies:
Stamps: Paper Smooches - Joyful Greetings, Christmas Sampler
Ink: Versa Mark
DP: MME - Signature Christmas
CS: Recollections
Accessories: Grand Calibur; Paper Smooches - Flag Tag dies; Stampendous - Azurite EP; heat gun; Recollections - rhinestones
Adhesives: SA by 3L - 3D foam squares, MyStik permanent


Saturday, December 14, 2013

Drunken Stampers #154 - Place: Paris

Hello and good morning to you all! It's Saturday and that means it's time for another challenge at the Drunken Stampers challenge blog! This week my teammies, the Tropical Hooters, are up. This week for our Person/Place/Thing challenge is a place: Paris to be exact!


You can make a project with Paris in particular, or use romance in general. Here's what I came up with:


Here's the inside:

Yep, another snarky sentiment on the inside. Oh how I lurv to do that! LOL! After adhering the blue panel to the card base, I inked the edges with Ranger DI walnut stain. For the main panel, after stamping off first on some scrap paper,  I stamped the Eiffel Tower off the lower left edge and inked around the edges.  I added the wine glass and cheese stickers. The bread was clip art I printed and fussy cut. I also printed out the inside sentiment. I thought it needed a little something more, so I glued tiny flowers and rhinestones at the top of the main panel. Good, that's better. (at least to me. ☺)

Since I have stickers, flowers and bling, I'm going to enter this at Shopping Our Stash #130


Thanks for stopping by and please make sure you check out what the other Tropical Hooters came up with! Even better, why not challenge yourself and make a Paris inspired project via the Drunken Stampers challenge blog! You know you want to! LOL! Have a great day and craft on my friends!

Chris
Supplies:
Stamps: Unity December 2012 KOM
Ink: Memento - Rich Cocoa; Ranger DI - Walnut Stain
DP: MME - Paris & Co.
CS: Bazzill; Recollections
Accessories: Jolee's Boutique - stickers; Flowers from my stash; Recollections - rhinestones; Inside sentiment & bread clip art printed from computer
Adhesives: SA by 3L - MyStik Permanent, 3D foam squares

Tuesday, December 10, 2013

Glowing Christmas Trees...

Hello and happy Tuesday! Well, the snow has finally stopped a couple of hours ago and is headed up the coast towards the new England states. Luckily, I don't think we got much more today than 2"-3" of snow. On top of what we got on Sunday. Now it's time for some 50 or 60 degree weather to make it all go away! LOL!

Anyhoooo, I want to share a card I made using the glowing lights tutorial from Splitcoaststampers.  I'll be entering this for CAS-ual Fridays #122 - Out on a limb. (use a tree or trees)


Here is the finished inside:


What a fun idea! I had a blast trying this out! I used my handy dandy Slice machine and cut three trees from green card stock, then went to work on them according to the tutorial. One thing I did differently was to use Clear Snap ink. I dotted the trees using a white Gelly Roll pen, and let dry.  I applied the colors with q-tips, and let that dry. The other thing I did differently was that I used a gold Gelly Roll pen to add the garland. The two smaller trees are adhered directly to the music sheet panel and the larger tree is popped up between them with foam squares.
 
Seriously, this was so much fun to try. I hope you give it a go also! Thanks for stopping by and stay crafty!
 
Chris
Supplies:
Stamps: Hampton Arts/G45 - Christmas Emporium
Ink: Clear Snap - Canary, Orange, Scarlet, Heliotrope, Blue Iris; Memento - Tuxedo Black
DP: G45 - Christmas Emporium
CS: Bazzill Basics
Accessories: Slice die cutting machine & Noel cartridge; Sakura Gelly Roll pens - white, gold; EK Success - Deco Scallop Edger
Adhesives: SA by 3L - MyStik Permanent, 3D foam squares


Monday, December 9, 2013

Season's Greetings Cardinal...

Hello my friends! I hope you all have survived the bad weather we have been receiving the last couple of days. We got at least 3" of snow yesterday, but the thermometer made it up to 37F today, so a lot of it melted. Good thing too. The so called weather experts are calling for another 3" to 5" of snow. Oh joy and rapture!

I have a card to share that I made using the Sweet Sunday Sketch #199: I tried the chalkboard technique again, and I love it! Check it out:


Here's the inside:

and the sketch:

What a fantastic sketch! I'd be lost without sketches. On rare occasions I'll make a card without any help (sketch, colors, photo inspiration), but I usually don't like how they turn out. Thus I use all the help I can get! LOL! I've had this stamp set for at least a year or more, but this particular image never saw ink until today. It just screamed at me to make it a chalkboard image. So I did! I followed the sketch very closely this time. (Well, as usual) For the main panel, after stamping and blasting it with a heat gun to set the ink, I lightly colored over random holly leaves and the berries with Prisma Color pencils. Added some tiny red rhinestones to one of the corners, added the border and black rhinestones, finished the inside and boom! Done! It sounds like I made this in minutes, but truthfully, it probably took two hours to do, mostly from trying to decide what papers to use. (too much stash - gotta start using it! LOL!)

Thanks for stopping by and I hope that you all have a good evening! Stay crafty my friends!

Chris
Supplies:
Stamps: Inkadinkado - Holiday Words; MFT - Seasonal Sentiments
Ink: Clear Snap - Frost White; Memento - Tuxedo Black
DP: Creative Imaginations - Winter Woodland
CS: Recollections
Accessories: Prisma Color pencils; Recollections - red rhinestones; Colorbok - black rhinestones; heat gun
Adhesives: SA by 3L - MyStik Permanent, 3D foam squares


Sunday, December 8, 2013

Holiday Cheer....

Hello and happy Sunday! We got some snow today! At least 3", probably more, then it turned to sleet. Oh joy and rapture. Perfect weather to make some cards! Here's one I made using Dahlhouse Designs Wanna Sketch #11:


Here's the inside:

...and the sketch:

Now that's my kind of holiday cheer! LOL! I stamped and heat embossed the sentiment, then stamped two wine glasses directly onto the main panel. I die cut and stamped the third glass and adhered with foam squares. A little masking for the inside sentiment and I was done.

It was a "Suzy Homemaker" day today. I made pumpkin chocolate chip muffins from scratch for breakfast this morning, then put a roast in the crock pot for dinner tonight. Yum! I even shoveled the front, including shoveling out Andy's car! I. Am. Done. (I would have done the back, but the carpel tunnel in my right wrist protested too much.) No worries, Andy took care of that for me! Now, it's time to relax with a glass of wine and just chill!

Thanks for stopping by! Stay crafty my friends!

Chris
Stamps: Paper Smooches - Christmas Sampler; Free Spirits, Shadows, Joyful Greetings
Ink: Memento - Tuxedo Black, Rhubarb Stalk, Gray Flannel; Versa Mark
DP: MME - Winter Wonderland
CS: Recollections
Accessories: Grand Calibur; Paper Smooches - Free Spirits Icons dies; Stampendous - Alexandrite EP; heat gun; Fiskars corner rounder
Adhesives: SA by 3L - MyStik Permanent, 3D foam squares

Thursday, December 5, 2013

Just a chillin'.....

So I saw this card on page 66 of the Winter 2013 Card Maker magazine, and it screamed to me to CASE it. So I did. Here it is:


Here's the inside:

Had I been on the ball, I would have taken a picture of the page to display here so you could see it. Now you all will have to go out and buy the issue! LOL! I just loved the sketch, the colors, the repeated sentiment on the banner, and the woodgrain background on the cased card! I think I will be making more using this sketch, I really like it!

That's it for now. A short and sweet post. Thanks for hanging out with me! Now go forth and get your craft on!

ETA: I'm going to enter this in the TAWS Be Inspired #43 challenge. Here's the inspiration picture:


Chris
Supplies:
Stamps: TAWS - Chill Out, Love Knots; Paper Smooches - Christmas Sampler
Ink: Memento - Tuxedo Black, Rich Cocoa; Ranger - Peacock Feathers
CS: Recollections (kraft); Bazzill (red, aqua); Copic X-Press It
Accessories: Spectrum Noir markers; Grand Calibur; Darice - snowflakes EF
Adhesives: SA by 3L - MyStik permanent; 3D foam squares

Monday, December 2, 2013

Joy....

Happy Cyber Monday! Wow, the internet is running kinda slow today. LOL! Here's hoping that I can get this post done before it crashes! Here's a card I made last night:


Here's the inside:

I used the sketch from Deconstructed Sketch #128 

and the colors from CTD #270

I'm not completely happy with how this turned out, but I got all the elements needed so I'm leaving it as is. I really like the sketch, so perhaps I'll be using it again. ☺ On the embossed panel, I went over the design lightly with Frost White ink to make it more visible and also to break up the kraft on kraft. I stamped the sentiment then thought it needed something more so I stamped the snowflakes. (Probably should have stamped the snowflakes first then the sentiment. Oh well, you live and learn!) And who doesn't enjoy silver glitter paper for some added shine! (Of course, if you really look at the inside, you'll see it started going everywhere! I'd clean it up, blink, and there was more! Grrr!) 

I'm also going to enter this for Shopping Our Stash #129 - Holiday or Winter, and

Thanks for looking and feel free to leave a comment. It does my ego wonders! LOL! Have a great day!

Chris
Supplies:
Stamps: Hampton Arts/G45 - Christmas Emporium; MFT - Seasonal Sentiments (snow flake)
Ink: Memento - Rich Cocoa; Clear Snap - Frost White
DP: G45 - Christmas Emporium; American Crafts - Christmas Glitter pack
CS: Recollections
Accessories: Grand Calibur, Standard Circles sm. & lg. Nesties; Cuttlebug EF - from James' Set; May Arts Ribbon - burlap; Offray Ribbon - silver; Michael's foam snow flake; Fiskars corner rounder
Adhesives: SA by 3L - MyStik Permanent, 3D foam squares; Recollections red tape

Sunday, December 1, 2013

You deserve only the best....

Hi there and happy first day of December to you! (Where did this year go?) I have a card to share using the Paper Smooches Sparks Picture Perfect challenge. Nothing like getting a card entered under the wire! LOL! Can't help it. It took me until last night to come up with an idea! Here's what I got:


The inside...

...and the inspiration picture

So, I took a more literal interpretation of the picture. I tried to mimic the sunset by masking a sun then using distress inks around the panel. I liked the silhouettes of the couple so I die cut the royals icons for that. (it's hard to see but I used a shadow stamp to ground them) For the balloons, I took some vellum and scribbled five different SN markers on it. Once dry I stamped the balloons with solvent ink, fussy cut and adhered. Drew the strings for the balloons then adhered the silhouettes. A little stamping on the inside finished the card.

ETA: I'm also going to enter this for the Simon Says Stamp Wed. Challenge - anything goes.

That's it for now. I may be back later with another post. (wink!) Thanks for stopping by and stay crafty my friends!

Chris
Supplies:
Stamps: Paper Smooches - Hullabaloo, Shadows, Good Gab, Royal Cuteness
Ink: Ranger DI - Wild Honey, Vintage Photo, Walnut Stain; Memento - Rich Cocoa; Staz On - Jet Black
CS: Bazzill (brown); Recollections (white); WRMK (honey)
Accessories: Grand Calibur, Standard Sm Circle Nesties; Paper Smooches - Royal Icons Dies; Spectrum Noir markers; Recollections - vellum
Adhesives: SA by 3L - MyStik Permanent, 3D foam squares; Elmer's extra strength glue stick

Saturday, November 30, 2013

Drunken Stampers #152 Thing: Metal

Good Morning to you! To those living in the States, I hope you all had a fabulous Thanksgiving! As always, I ate too much. LOL! Guess I really need to get back on that treadmill soon. Ugh!

Anyway, today starts a new challenge at the Drunken Stampers challenge blog! For our Person/Place/Thing challenge this week, it's a thing. Metal to be exact.


So, of course, I was maybe/sort of/kinda stretching it when I made my card for this challenge:


Here is the finished inside:

Shopping carts are made of metal, aren't they? (Anyone? Anyone? Bueller?) Well, that's my story and I'm sticking with it! ☺ I stamped a bunch of shopping bags from scrap paper and die cut the cart from gray card stock. I glued the bags to the inside of the cart before adhering it on the card with foam squares. The center of the wheels were hand cut circles from a scrap of black card stock. I purposely cut them wonky because, well, who has ever pushed a cart that didn't have at least one wheel go wonky! Yeah, you know what I'm talking about! I tied some floss to the handle, stamped the sentiment and finished the inside. Yep, I'm being me again, going with another snarky sentiment! LOL! I thought it fitting since yesterday was Black Friday! HA!

Well, that's it for me. Be sure to check out what the other members of Team Tropical Hooters came up with to delight and inspire you! Better yet, why not play along with the Drunken Stampers this week? You may even by crowned the Life of the Party! Woot Woot!

Have a great day and stay crafty my friends!

Chris
Supplies:
Stamps: Bugaboo - Stella Christmas Psycho; Paper Smooches - Retail Therapy
Ink: Memento - Tuxedo Black; Ranger DI - Peeled Paint
DP: Scraps
Card stock: Bazzill (red, gray); Recollections (white, black)
Accessories: Grand Calibur; Paper Smooches - Shopping Cart die; DMC floss
Adhesives: SA by 3L - MyStik Permanent, 3D foam squares; Elmer's extra strength glue stick 

adding pinterest script 3. Changing the Position of the Pin it! button The cool thing about this code is that you have some freedom over where the Pinterest button for Blogger will go over the image. Take a look at the code that you just copied and pasted into the HTML for the word 'center'.