Showing posts with label Dylusions Ink. Show all posts

Saturday, January 8, 2022

SISTERHOOD OF SNARKY STAMPERS #201 - I is for Ink


Hello and welcome snarky peeps! Holy Crap, it's 2022!
It's also time for the new challenges to start up at the
For this first challenge of the new year, we want to see
your inky creations! Speaking of inky, Sister Lee has
done it yet again with this glorious colorful graphic!

For my card, I used Dylusions ink sprays on the background
panel, plus alcohol ink markers to color the cake image:


This was a labor of love. In the below picture, the original
cake image is shown, along with a bunch of stamped and fussy cut
candles that I added. Once I had everything stuck down, I gave
the flames a coating of Crystal Stickles for a bit of sparkle.


I continued the snark on the inside of my card:


Guess what? I decided to make TWO cards! Yay me!


I hope that you'll join Edna and the Sisters and play along in our
Ink challenge at the Sisterhood of Snarky Stampers!
Need more ideas? Just visit the blogs of my Sisters and our
reigning Queen, Stephanie, to see their amazing projects!
Thanks for visiting, have a great day!


I'd like to enter this at:


Supplies:
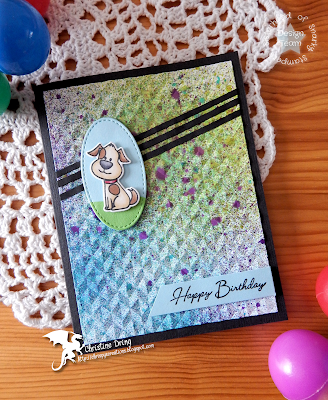
Stamps: Technique Tuesday - Umpteenth Birthday; Honey Bee Stamps - Inside Snarky Birthday Sentiments; PhotoPlay - Dog Lover (2nd card)
Ink: Memento - Tuxedo Black, Dandelion; Altenew - Crimson
CS: Neenah; Cardstock Warehouse
Accessories: Spectrum Noir markers; GC; Altenew - Angled Mosaic EF; Sunny Studio - stitched Ovals 1 die; Dylusions ink spray - lemon zest, pure sunshine, postbox red, pomegranite seed, (fresh lime, vibrant turquoise, crushed grapes on 2nd card); Taylored Expressions blending brush; Ranger - Crystal Stickles; MISTI
Adhesives: SA by 3L - tape runner, thin 3D foam squares, adhesive sheets; Scor Tape


Wednesday, January 8, 2020

Shimmery snowflakes


Hello crafty friends! I had some play time up in the craft room,
and decided to use a die that I bought last month but hadn't used yet.


...well, the main panel is all shimmery, that is:


and the inside:

I made a bunch of water color-y backgrounds last year, and one of my goals this
year is to actually use them. This one is Dylusions spray inks, then pearl Glimmer Mist
over that, on mixed media paper. I edged the main panel with some black card stock strips
to make it pop more. A simple sentiment and some star shaped rhinestones in the
center of all the snowflakes finishes this card. 

This card was fitting as we had our first decent snow fall yesterday. Ok, maybe it
was only about 2", but it was enough to delay school openings.
Being originally from and growing up in Illinois, I still find this completely hilarious.
(Perhaps more like ridiculous.) As a kid, if the schools closed for a snow day, it would
have had to snow at least a foot before closing was even considered. LOL!

That's all for now. Thanks for visiting. I hope you have a great day!


I'd like to enter this at:
The Paper Players #472  (new snowflake die)


Supplies:
Stamps: Hero Arts - color layering Christmas tree
Ink: Memento - nautical blue
CS: Strathmore mixed media paper; Neenah; scraps
Accessories: Gemini; Memory Box - Tisdale Snowflake Collage die; Dylusions ink sprays; Tattered Angels Pearl Glimmer Mist; MISTI: Recollections star rhinestones
Adhesives: SA by 3L - tape runner


Saturday, July 27, 2019

SISTERHOOD OF SNARKY STAMPERS #140 - S is for Sea

(Shout out to Sister Lee for her astonishing graphic arts skillz!)

Hello and happy Saturday to you.
It's time for the new challenge at the
This fortnight is brought to you by the
letter S, as in SEA!
We want to see your ocean themed projects.
This is a card I made for one of my sisters a couple months
ago, but it fit this challenge so perfectly that I saved
posting about it until now. LOL! 


and the inside:

I bought the fish scale plate and the mermaid stamp earlier this year, and
this was the first time using them. I started by creating my underwater
background using Dylusions spray inks on watercolor paper, then adding
some Aquamarine Glimmer Mist over that for additional sparkle.
While that dried, I colored and fussy cut my mermaid, and die cut the fish
scale plate. I added some Diamond Stickles to the centers of the flowers
in her hair, and added Wink of Stella to her bottom half.
This card is sooooo shimmery IRL!! I cut up a group of rhinestones
and added them because to me they looked like air bubbles.
A simple sentiment on the inside finishes my card.

I hope that you find some time to play along in our Sea challenge
at the Sisterhood of Snarky Stampers! We'd love to sea what you
come up with. My Sisters and our reigning Queen Rina have created some fabulous underwater
masterpieces, so please visit their blogs to check them out.
Thanks for stopping by. Have a fabulous day!


Supplies:
Stamps: Unity - She Mermaid; Gina K. - Stippled Flower; Avery Elle - Happy Hour
Ink: Memento - Tuxedo Black, Bahama Blue; Versamark
CS: Strathmore water color paper; Neenah; Darice; Taylored Expressions; Crafter's Companion
Accessories: Spectrum Noir markers; GC; Impression Obsession - fish scale background die; Dylusions spray inks - London Blue, Vibrant Turquoise, Cut Grass; Tattered Angels - Aquamarine Glimmer Mist; Ranger - Diamond Stickles; WOS pen; MISTI; Stampendous - Champagne EP; heat gun; David Tutera - rhinestones
Adhesive: SA by 3L - tape runner, thin 3D foam squares; Ranger - Multi Medium Matte

Tuesday, March 26, 2019

SHOPPING OUR STASH #392 - Make an ATC


Hello and happy Tuesday to you all!
It's time for a new challenge at 
This fortnight we are challenging you to step outside your
comfort zone and make an ATC, either a card or coin!

Here's my Artist Trading Card:


Grab your favorite beverage, this is a photo heavy post!
I started by cutting my ATC's from recycled cardboard (2-1/2" x 3-1/2")
and gave the front sides a coat of Gesso.


I cut a mop up paper towel that had Dylusions spray inks on them,
and adhered to the card with clear gesso.


After dry and the edges were trimmed, I went over the cards with crackle embossing
paste and a heart stencil. While drying, I die cut some mermaid silhouettes from black
card stock, and Winked all of them for some shimmer.


To make sure the edges didn't tear, and to add a border, I used my finger and painted
gold paint around the edges. 


I printed out my sentiment on the computer, doodled around the words and cut out.
The mermaids and sentiments are adhered with foam squares, then I added some
ancient bling from my stash for more sparkle.


You can kind of see the shimmer on the mermaid below and how the gold shines.
I love the added texture from the paper towel!


Yay! You made it to the end!
I hope that you find some time to play along in our ATC challenge at
Shopping Our Stash! We look forward to seeing what you create.
Need more ideas? Simply visit the blogs of my teammies to see
what amazing cards and coins they've created!
Thanks for visiting, and I hope you have a fabulous day!


I'd like to enter this at:


Supplies:
recycled cardboard
Golden Gesso
Plaid paintbrush
Dina Wakey clear Gesso
mop up paper towel that had Dylusions spray inks on it
STAMPlorations - Hearts All Over stencil
Dreamweaver - crackle embossing paste
pallet knife
Delta metallic 14K gold acrylic paint
Grand Calibur
Impression Obsession - Mermaid dies
Wink of Stella pen
scrap card stock
computer and printer
Sakura - metallic blue Gelly Roll pen
SA by 3L - thin 3D foam squares
Momenta - jewel stickers

Tuesday, March 5, 2019

29 again?

Hi there crafty friends, and happy Mardi Gras to you!
Someday I hope to experience that in New Orleans.
Yep, it's a bucket list item! LOL!

Speaking of fun and festive, I've got a birthday card to share:


Here's the inside:

I love that sentiment paired with this sassy lady! LOL!
She's colored with Prismacolor pencils, fussy cut and popped up on
foam squares over the inky background. That panel was made
by spritzing a couple colors of Dylusions ink sprays. I then covered it with
a stencil and wiped away some of the ink with a baby wipe to get
that ghost image. It's a fun technique!

That's all for now. Time to walk the fur baby.
Have a great day and thanks for visiting!


I'd like to enter this at:


Supplies:
Stamps: Art Impressions - Golden Oldies Jean; Paper Smooches - Birthday Sampler
Ink: Memento - Tuxedo Black; Dylusions spray inks - Vibrant Turquoise, Fresh Lime
CS: Crafter's Companion; Strathmore mixed media paper; Neenah; Darice
Accessories: GC; Lawn Fawn - scalloped rectangle die; Prismacolor pencils; Dylusions - bowl of cherries stencil; baby wipe; MISTI
Adhesives: SA by 3L - tape runner, Thin 3D foam squares

Tuesday, April 17, 2018

SHOPPING OUR STASH #350 - Yo! Dude!


Hello and happy Tuesday!
Today starts the new challenge at
Yo! Dude!

We want to see projects for the special men in your life.
(or for a complete stranger. We don't judge. *wink*)

Here's the card I made:

and the inside:

My teammate Barbara was kind enough to send me some stamped
images from the Hipsters set by Tim Holtz. I thought it was high
time I used them. (again, hoarder)
The chimp dude was colored with Prismacolor pencils and Glossy Accents added to his glasses. 
That background panel I had made a couple months ago, and decided to finally use it.
It's die cut, sprayed with a couple Dylusions spray inks, stenciled over
with embossing paste, then splattered with black ink.
(drying between all layers, of course)
The black panel was dry embossed with stripes before adhering 
everything together all wonky like.
As for the inside sentiment, I printed that out on my computer.
(Shout out to Charlton Heston from the Planet of the Apes movie!)
As everyone in my family shares a snarky sense of humor,
this will eventually be mailed to one of my male relatives. LOL!

I look forward to seeing your male themed creations in the gallery
at Shopping Our Stash! For more ideas, do yourself a favor and
visit the blogs of my teammies. You won't be disappointed.
Thanks for visiting, and I hope you have a great day!


I'd like to enter this at:
Naughty or Nice Challenge #50 - Using challenge #5: For the men


Supplies:
Stamps: Tim Holtz - Hipsters; Paper Issues - Freaking Sentiments
Ink: Memento - Tuxedo Black, Lady Bug
CS: Neenah; Bazzill/ Thunderbolt
Accessories: Dylusions spray inks - Cut grass, vibrant turquoise; Dreamweaver - embossing paste;
DecoArt Media black acrylic paint; toothbrush; GC; Lifestyle Crafts - inverted scallops die; SB - Std. Sm & Lg circle Nesties; Cuttlebug - striped EF from the James Set; Prismacolor pencils; Ranger - Glossy Accents; Istencil -27-00072 rsc stencil; computer and printer
Adhesives: SA by 3L - tape runner, Thin 3D foam squares; American Crafts - tacky tape; Scotch - foam tape
adding pinterest script 3. Changing the Position of the Pin it! button The cool thing about this code is that you have some freedom over where the Pinterest button for Blogger will go over the image. Take a look at the code that you just copied and pasted into the HTML for the word 'center'.