Showing posts with label DecoArt Media Fluid Acrylics. Show all posts

Saturday, July 11, 2020

SISTERHOOD OF SNARKY STAMPERS #164 - Z is for Zebra


Hello and good morning snarky peeps!
It's time again for a new challenge at the
Z is for Zebra is this fortnight's challenge.
Now, if you don't have anything zebra-ish in your stash,
don't fret. Just use some black/white stripes and you're all set!
Here's what I came up with:


and the inside:


I did a thing: I made my own zebra paper!


Aaanndd then I die cut it and almost completely covered it up. LOL!
I purchased a cut-apart 12" x 12" sheet of DP with these punny animal
squares a while back, and luckily remembered that one of the squares
had this zebra on it. 
I hope you find some time to play along in our Zebra challenge at the
Sisterhood of Snarky Stampers! We'd love to see your take on it.
For more ideas, simply visit the blogs of my Sistahs and our 
reigning Queen, Sharon, and leave a comment while there.
Thanks for visiting. Have a great day!


I'd like to enter this at:


Supplies:
Stamps: My Favorite Things - Birthday Greetings
Ink: Memento - Tuxedo Black
DP: Reminisce - Happy Birthday
CS: Neenah; Bazzill; Strathmore Mixed Media
Accessories: GC; Lifestyle Crafts - Inverted square dies; MISTI; DecoArt Media carbon black acrylic paint; paint brush
Adhesives: SA by 3L - tape runner, Thin 3D foam squares

Saturday, June 27, 2020

SISTERHOOD OF SNARKY STAMPERS #163 - W is for Water


Good morning and welcome snarky peeps!
It's time again for the new challenge at the
This fortnight we want to see your water themed projects.
That could be an ocean scene, something to do with bathing, 
beverages of some kind. Lots of possibilities!
I went with an underwater scene for my card:


Here's the inside:


I used Distress Inks for my ocean background, and using a great tip
from Barbara Anders post, I used white acrylic paint and a stencil
for the sun rays. I also did something that I rarely do: use a purchased item
right away, instead of letting it sit on my desk for a month, or more. The 
NBUS items are the shark die and the sentiments. Just look at that
creepy/cute shark! I just had to use it right away!

Now it's your turn to create something watery, and link up at the
We can't wait to see what you come up with. For more ideas, simply visit
the blogs of my Sisters, and our reigning Queen, A. Rose, to see 
their amazing creations.
Thanks for visiting. Have a great day!


I'd like to enter this at:


Supplies:
Stamps: My Favorite Things - Sharky Sentiments
Ink: Ranger DI - Broken China, Mermaid Lagoon, Blueprint Sketch; Versamark; Memento - Tuxedo Black
CS: Canson Bristol; TE; Bazzill
Accessories: GC; MFT - Baby Shark Die-Namics; Tim Holtz - Rays stencil; DecoArt Media Fluid white acrylic paint; paintbrush; water mister; Stampendous - white EP; heat gun; MISTI; Picket Fence Studio - blending brushes; Sakura - white Gelly Roll pen
Adhesives: SA by 3L - tape runner, 3D foam squares; Ranger - MMM

Saturday, May 4, 2019

SISTERHOOD OF SNARKY STAMPERS #134 - W is for WTF!


Hey snarky peeps, welcome back!
It's time for the new challenge at the
This time around, the letter du jour is
W for WTF!

Whether you interpret that to mean using 'WTF' on your project, or
making something that makes you think: WTF?!, we want to see it!

I went with the latter for my art journal spread:


Once again, a meme that I saw on the internet was my spark of inspiration.
Here's some pics on how I created this:
Brayer various pink, red, and orange paints.


Add same paints plus white through various stencils.


Doodle around stenciled images with various markers.


Stamp, fussy cut and glue the faces onto flowers with matte medium.


I found the perfect horse image in a NatGeo magazine.
(unbelievably, it only took looking through five of them to find it)
I drew the horn, colored with Spectrum Noir markers and fussy cut.
Stamped, colored and fussy cut the lady image, then glued them down
using matte medium. I swiped a green ink pad
along the edges.
 

Smudged a black pencil around the unicorn and lady.
I used some gelli print leftovers to die cut the grass border a gazillion times,
then glued them down with matte medium. Once it dried, I trimmed 
around the edges.


I used an alphabet stamp set to stamp the sentiment on typing paper,
fussy cut and glued down. Once dry I doodled around the words
with a couple markers.


One more time:


So now it's your turn to show us your WTF creations! We'd love
to see them in the SOSS gallery. Need more ideas? Simply check out
what my Sistahs, and our newest Queen and GD Granne, have
created for your viewing pleasure.
Thanks for visiting, and I hope you have a great day!


I'd like to enter this at:


Supplies:
Strathmore Art Journal
DecoArt Media gesso
paint brushes - Loew-Cornell; Plaid
DecoArt Americana Acrylic paints: Tangerine, Dragon Fruit, Electric Pink, True Red, White
DecoArt Media Acrylic paint: vermilion
Imagine Crafts - craft sponges
StencilGirl stencils: ATC Mixup-Dailey, ATC Mixup-Dube, ATC Mixup-Evans
Faber-Castell: Artist PITT pens - black, green olive, pink carmine
Sakura - white and silver Gelly Roll pens
Stamps: VLVS - plate 1503; Dylusions - black diamonds; Studio G - alphas
Memento ink: Tuxedo Black, Grape Jelly; Staz On - Emerald City
CS: Darice
typing paper
Spectrum Noir markers
DecoArt Media - Matte Medium
horse picture from a National Geographic magazine
Generals - pastel chalk pencils - black, grass green
Ranger - Diamond Stickles (on horn)
scraps of gelli prints
Grand Calibur
Taylored Expressions - grass border die

Wednesday, October 24, 2018

I Ain't Got No...Body

Hello peeps and happy Wednesday to you!
I was working on a mixed media canvas the last few days
and finally finished it.
Still in the Halloween mood, of course,
as it's my favorite holiday. Take a look:

 
 Here are a few process pics. I prepped the canvas with gesso, and once dry
added the music sheet paper with matte medium. I got into playing and forgot
to take pics of that first. LOL!
Next layer was the skull stencil with crackle paste and the snakeskin stecil
with modeling paste. I added some texture sand paste randomly around the
edges once the stencil layer was dry.


 Added a wash of Paynes Grey around skull.


 Then Primary Yellow and more Paynes Grey over that.


Next I went over the entire canvas with Quinacridrone Gold,
 blotting some back with a baby wipe, especially on the skull.
I wanted it to look aged, but not too orange.
I swiped a Jet Black Staz On ink pad over the snakeskin stencil to bring
the texture out more, and also around the canvas edges.


The sentiment? Well that was what inspired this canvas.
And it was my husband's idea!
We have this big skull sitting on the stair landing, and he 
just started singing "I ain't got no body." After laughing
our asses off, I said that was brilliant and I needed to
make a punny skull project! 

I used alpha stamps to stamp the sentiment on white card stock,
then aged it with tan and brown sponged ink. Also stamped some
texture using gray ink.
That was applied with matte medium. Once dry I sealed it with 
matte varnish.
I added the flowers to ground my skull and that was it!


You made it to the end of my post! Yay!
Thanks for visiting. I hope you have a fabulous day!


I'd like to enter this at:


Supplies:
Substrate: Premiere by Nicole 8" x 10" canvas
Loew- Cornell & Plaid paintbrushes
DecoArt Media: Gesso, crackle paste, modeling paste, texture sand paste, matte medium
American Crafts; music sheet paper
pallet knife
Plaid Folkart: skull stencil
Andy Skinner: snakeskin stencil
DecoArt Media Acrylic paints: Paynes Grey, Primary Yellow, Quinacridrone Gold
Staz On - Jet Black ink
Memento - Rich Cocoa, Toffee Crunch, London Fog inks
Stamps: My Sentiments Exactly - Alphas; Dare 2B Artzy - Textures
Flowers: Recollections; Nicole
white card stock: Core'Dinations
E-6000 glue
DecoArt Americana Dura Clean matte varnish

Sunday, May 6, 2018

A courageous art journal page

Hello peeps! Happy Sunday!
Just popping in with another art journal page
from my One Badass Art Journal.

This is week 5, (yes, I know we are on week 13 now. I work at my
own pace. Snail pace.), taught by Kara Bullock. I've got to say,
this is my favorite page so far. LOVED doing the collage on this!
Here, check it out:


Here are a few process pictures:


The finished page again:


And that, my friends, is my Queen of Courage.
Thanks for visiting, and I hope you have a great day!


Supplies:
various scraps of paper
butterfly- DCWV Mariposa stack
lady image - G45 Hollywood Vogue
castle, sentiments, clock, crown/bee - printed from computer
DecoArt Media - matte medium
various paint brushes
DecoArt Americana acrylic paints - Napa Red, Warm Beige, Lamp Black, Marigold
DecoArt Media fluid acrylic paint - Titanium White
Sakura Gelly Roll pens - white, gold
Faber Castell Artist PITT pens - small black
Stabilo All black pencil
VLVS - eye stamp
Staz On ink - Timber Brown, Pacific Blue
sponge tool

Saturday, November 25, 2017

SISTERHOOD OF SNARKY STAMPERS #98 - I is for Industrial


Hello and welcome snarky peeps!
I hope those who celebrated had a happy Thanksgiving, and
that those who braved the Black Friday sales
made out with some excellent deals.

Our next challenge at the SISTERHOOD OF SNARKY STAMPERS
is one of my favorites: I is for Industrial 
It's time to get your Steampunk on!! YAY!

I went all mixed media and created this canvas panel:
(grab your favorite beverage, this is gonna be a photo heavy post)


This baby has sooooo much texture!
There were some new to me techniques I tried out, one being how
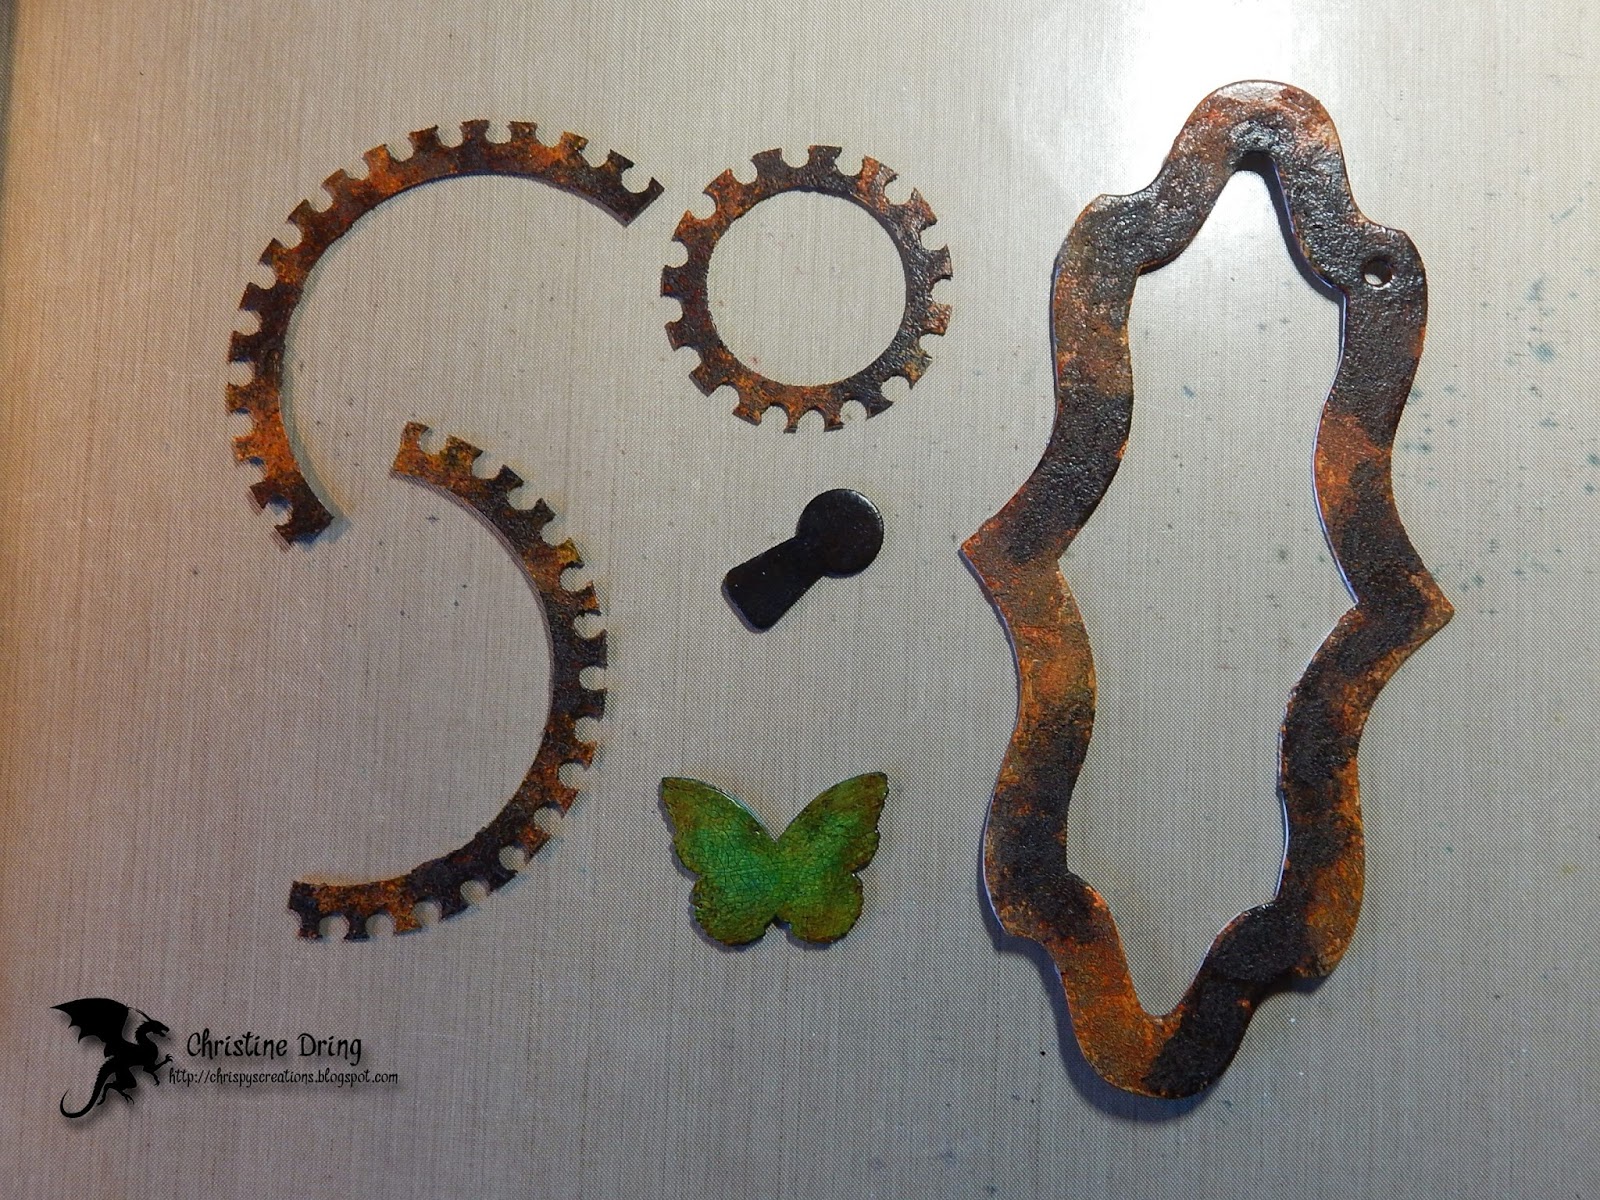
I created those large cogs. I found some round chipboard frames in my stash
and decided to turn them into cogs using a hole punch!
They originally had a flowery pattern on them, but a couple coats of
gesso fixed that. Then I simply punched around the frames, being sure to
punch off the edge and not make a complete circle.


 I also rediscovered a chipboard album, and used parts from that also. On the cogs and
frame, I used another new to me technique called the Faux Rust Technique by Andy Skinner,
using texture sand paste and DecoArt Media fluid acrylics.
Holy crap, I had a blast making rusty cogs! LOL!
The wooden butterfly was a gift from my E.D.M.T., Jessi.
(Evil Double Mint Twin)
I gave it a coat of gesso, then crackle paste, and then painted it.
(air drying between each process, of course)


Ok, so here are a bunch of close ups of the canvas:


 One last view :


I hope that this inspires you to unlock your inner muse and create
something steampunk! We'd love to see it in our gallery at the
Sisterhood of Snarky Stampers! Need more ideas? Well then, do yourself
a favor and go check out what my Sistahs of Snark, 
and our guest designer, Corrie, have created for your viewing pleasure!
Yay! You made it to the end!
Thanks for visiting and I hope you have a fantastic day!


I'd like to enter this at:


Supplies:
substrate: 7" x 9" canvas panel, a gift from my neighbor
various paint brushes
Golden gesso
DecoArt Media - Crackle Paste
pallet knife
My Favorite Things - brick wall stencil
Maya Road - chipboard keyhole album
Golden matte medium
DCWV - Tattered Time Stack - script paper
X-Acto knife
Colorbok - round chipboard frames
Fiskars hole punch
DecoArt Media - Texture Sand Paste
DecoArt Media fluid acrylic paints: Paynes Grey, Quinacidone Gold, Primary Yellow, Green Gold,
Phthalo Turquoise
DecoArt Americana acrylic paint - Natural Buff
Beacon 3 in 1 glue
SA by 3L - 3D foam squares
Scotch - foam tape
Tim Holtz - sprocket gears, typed tokens
Art-C - gears, key
found sprocket
Wooden butterfly from Jessi
Darice - galvanized wire and wire cutters
Studio G - alpha stamps
Staz On - Jet Black ink
white card stock
Ranger Distress ink - Antique Linen, Vintage Photo


adding pinterest script 3. Changing the Position of the Pin it! button The cool thing about this code is that you have some freedom over where the Pinterest button for Blogger will go over the image. Take a look at the code that you just copied and pasted into the HTML for the word 'center'.