Showing posts with label Penny Black. Show all posts

Friday, January 19, 2024

Snow days are the best days

 Welcome and happy Friday!
I thought I'd show some love to some
older products.
I dived deep into my stash and
came up with this card:


These cute snowmen are from a set called 'Chill Out' by
The Alley Way Stamps. I'm not sure how old they are
but the little digging I did on the Google showed these
are approximately from 2013. These were colored and 
fussy cut. The background paper is the last snippet I had
from this collection from My Mind's Eye called Colorful Christmas.
I couldn't find much about it, it's that old. I'd say this
is at least 10 years old, probably older. 😉 The
sentiment is from a Penny Black set from 2021.


These snowmen are just too cute!

That's all for now. Thank you for visiting.
I hope you have a great rest of your day!


I'd like to enter this at:


Supplies:
Stamps: The Alley Way Stamps - Chill Out 2013; Penny Black - Snow Days 2021
Ink: Memento - Tuxedo Black, Teal Zeal
DP: My Mind's Eye - Colorful Christmas; DCWV - metallic purple; scrap
CS: Spectrum Noir; Neenah
Accessories: Spectrum Noir markers; Newton's Nook - Petite Snow stencil; MISTI; Gina K - Lg & Sm stitched square dies
Adhesives: SA - tape runner, thin 3D foam squares


Saturday, September 30, 2023

SISTERHOOD OF SNARKY STAMPERS # 244 - X is for Xanadu


Hello and welcome friends!
I took a bit of a break but I'm back.
My fur baby injured his shoulder last month
and I put crafting on the back burner
so I could focus on getting him better.

This fortnight at the
sounds like a doozie: Xanadu!
The definition of Xanadu is 
"An idealized place of great or idyllic magnificence and beauty."

 So, easy peasy: any place that you think is beautiful!
(There was also a movie made back in the 80's with
the same name starring Olivia Newton John. You
may see one of my teammies referencing that!)

Here's what I made:


I actually made this a couple months ago for my MIL.
I had then just recently bought the bird and flower dies.
I made two branches, one as shown with the bird tucked in,
and the other I cut apart and glued here and there on the panel.
Birds singing in a flowering dogwood tree is my kind of beautiful!


Here's the finished inside of my card:


I hope that you'll find time to play along in our
Xanadu challenge at the Sisterhood of Snarky Stampers!
Need more inspiration? Simply check out what my
Sisters and our reigning Queen of Snark, Granne, have made
for your viewing pleasure.
Also, my sisters and I have decided to take a short break, so this will
be the last challenge for this year. We will be back the beginning
of next year with all new fun challenges!
Thanks for visiting, and I hope you have a great day!


I'd like to enter this at Addicted to Stamps and More #455


Supplies:
Stamps: Honey Bee Stamps - Inside Birthday Sentiments
Ink: Memento - Tuxedo Black and whatever pink ink was left over on my blender brush
CS: Taylored Expression; Neenah; scraps
Accessories: Honey Bee - Lovely Layers Spring Birds dies, Lovely Layers Dogwood dies; Penny Black - Square Frames die; GC; MISTI
Adhesives: Bearly Art glue; SA - thin 3D foam squares


Thursday, April 13, 2023

Thinking of you

 Hello and welcome!
I'm popping in to share a card
I made for my SIL, who
recently had heart surgery.
She's doing great and we are very happy about that!


Close up of the floral spray, using
die cuts in kraft and vellum:


A simple sentiment finishes the inside:


That's it for now. It's a gorgeous day out, so I'm
getting off my computer and am going to enjoy it.
Thanks for stopping by. Have a wonderful day!


I'd like to enter this at:


Supplies:
Stamps: Fiskars
Ink: Memento - Rich Cocoa
DP: Photo Scraps custom paper - peach gingham; Bazill - vellum
CS: Thunderbolt; Neenah; WRMK
Accessories: GC; Spellbinders - std. sm. round and classic scalloped dies; Gina K - small square die; Penny Black - Bountiful Berries die; Memory Box - Lavender stems, Daisy stems, Wildflower stems; MISTI
Adhesives: SA - tape runner, thin 3D foam squares; Bearly Art glue


Tuesday, November 23, 2021

SHOPPING OUR STASH #459 - Triple Threat


Hello and good morning to you all.
It's time for the new challenge at SHOPPING OUR STASH!
This fortnight, it's a Triple Threat challenge: just add three of
something on your project.
Here's what I came up with:


Here's the inside:


Like many of us, I'm in Christmas card making mode.
Yes, I do make them throughout the year, but not nearly
as many as I wind up sending out. I've started mass 
producing and that helps considerably.
Obviously, I went with three tree images.
They all received a heathy dose of glitter glue,
plus the center tree's star was heat embossed in gold glitter.


I hope that you'll join in our Triple Threat challenge at
Shopping Our Stash! We'd love to see how you interpret it.
For more ideas, please do check out what my teammies
created to wow you!
Thanks for visiting. Have a great day!


Supplies:
Stamps: Penny Black - Oh Deer; Picket Fence Studios - Inside Quotes Christmas
Ink: Memento - Tuxedo Black, Rich Cocas; Altenew - Hunter Green; Brilliance - Galaxy Gold; Versamark
CS: Neenah; scrap
Accessories: MISTI; GC; Penny Black - Elegant Stitching die; Stampendous - Jeweled Gold EP; heat gun; Nuvo - white blizzard Glitter Drops
Adhesives: SA by 3L - tape runner, thin 3D foam squares


Sunday, July 25, 2021

Travelling via balloons!

 Hello and welcome crafty friends!
Can you believe that it's the last week of July?
This year is just whooshing by!

Yesterday, I had some play time in the craft cave, and
created this fun card:


I loved the stenciled cloud element on Jacquie's card, 
(such a brilliant idea! Thank you for the inspiration!), so I had
to try it for myself. 😊 I broke out my homemade cloud stencil
again, and stenciled onto the card front. For some added interest,
I die cut and glued the square frame die to the card base.
I stamped the sentiment then after coloring and die cutting the fox
 and balloons, glued them onto my card.
Another sentiment finishes the inside.

 
What a fun sketch to create this cute little scene. 😁
That's it for now. I hope that you enjoy the rest of your day.
Thanks for visiting!
 

I'd like to enter this at:


Supplies:
Stamps: Lawn Fawn - Really High Five
Ink: Memento - Tuxedo Black; Ranger DI - Broken China
CS: Spectrum Noir; Neenah; Bazzill
Accessories: Spectrum Noir markers; GC; Lawn Fawn - Really High Five dies; Penny Black - Square Frames die; handmade cloud stencil; Picket Fence Studios - blending brush; MISTI; Sakura - white Gelly Roll pen
Adhesives: SA by 3L - tape runner; 3D & thin 3D foam squares; Ranger - MMM

Monday, February 15, 2021

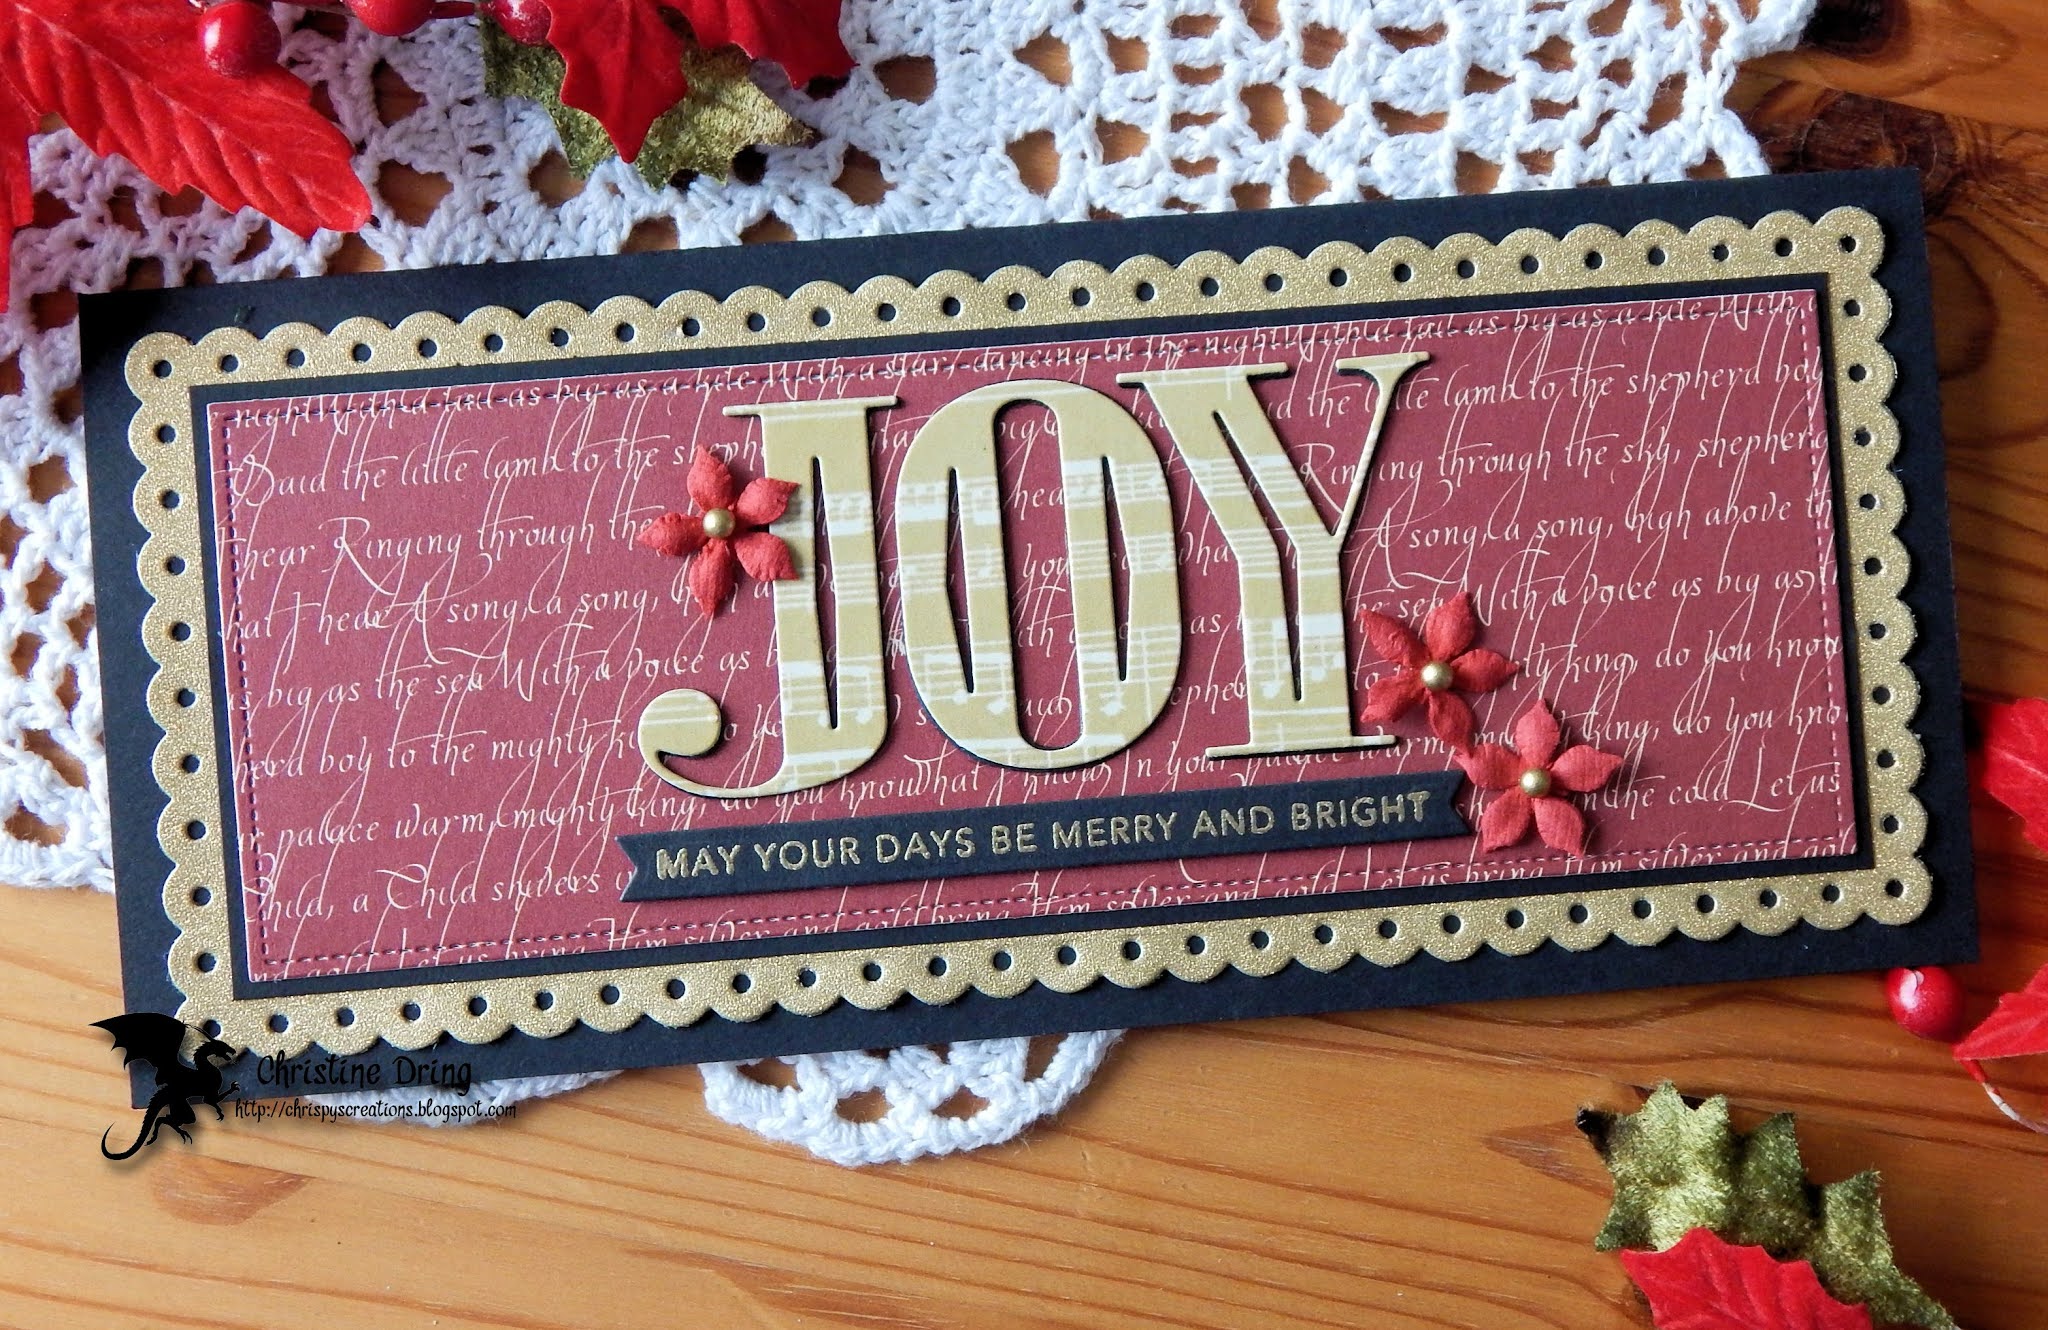
Joy slimline card

 Hello there and welcome.

Got a card to share that I was able to combine

some challenges for:

...and here is the inside:

I used a couple of patterned papers from an older Webster's Pages collection. The 

red one has this gorgeous script that is lyrics from the song, "Do you hear what I hear?"

I matted it with black card stock, then adhered it to a scalloped gold glitter panel.

The 'JOY' was die cut three times, twice in black card stock, and once in 

the music score paper. Those were stacked and glued to the card. 

I gold heat embossed the smaller sentiment and used the coordinating

die to cut it out. Last year I found this package of tiny poinsettia

flowers at Tuesday Morning, and finally opened the package

for this card! Another stamped sentiment finishes the inside.

That's all for now. I hope that you are staying safe during

the pandemic, and also in this string of nasty weather too!

Thanks for visiting!


I'd like to enter this at:

Christmas Kickstart #47 - slimline cards

Jingle Belles - Text Me Christmas 

Just Us Girls #571

Simon Says Stamp Wednesday Challenge - slimline cards 


Supplies:

Stamps: Taylored Expressions - Simple Strips Christmas; Sunny Studio - Season's Greetings

Ink: Versamark; Memento - Tuxedo Black

DP: Webster's Pages - Waiting for Santa

CS: Cardstock Warehouse; Nicole

Accessories: GC; Penny Black - Mirthful (Joy) die; Sunny Studio - Slimline Scalloped frames; Taylored Expressions - Simple Strips dies; Stampendous - detail gold EP; heat gun; Little Birdie - paper flowers; MISTI

Adhesives: SA by 3L - tape runner, thin 3D foam squares; Ranger - MMM

Tuesday, January 19, 2021

SHOPPING OUR STASH #437 - I Need a Cup of Coffee....


....or in my case, a cup of tea. 😄

Which happens to be the new challenge prompt at

SHOPPING OUR STASH!

Lets see your coffee or tea themed projects!

Here's what I came up with:


 Over the holiday break, I did some cleaning up and re-organizing in my

craft room, and in the process, re-discovered these tea cup and tea bag 

'handle' dies in my stash. Perfect for this challenge! I paired them with 

a sentiment that was inked for the first time. 

I hope that you find some time to join in our coffee/tea

themed challenge at Shopping Our Stash!

Need more inspiration? Simply check out what my lovely

teammies have created! Thanks for visiting.

Have a wonderful day!


Supplies:

Stamps: STAMPlorations - Literary Caffeine-ations

Ink: Memento - Rich Cocoa

DP: 49 and Market - Sky; DCWV - Mariposa

CS: Taylored Expressions; Darice

Accessories: GC; Paper Smooches - Stitched Circle die, Coffee & Tea icons; MFT - Stitched Circle Frame; Penny Black - Elegant Stitching rectangle die; MISTI; MME - twine

Adhesives: SA by 3L - tape runner, 3D foam squares: Glue Dots; Ranger - MMM; Score Tape

Friday, July 17, 2020

July Demo Day To Go at Photo Scraps!

Hi all!
Just wanted to let you know that I made a couple card kits for
Demo Day To Go at Photo Scraps!
It happens tomorrow, July 18th, from 10 am to 2 pm.


A little snarky:
 

 and a little sharky:


For the shark card, I've included the extra cut outs, mostly just in case
someone would rather use the light grey instead of the red for 
the inside of the shark's mouth. I've actually used the extra red mouth opening
part to construct my sample. Here's how I put the
pieces together:

Start with the big die cut. This die is great as it marks where all the
pieces will go!

 I used both red pieces on my sample, so that the next layer
will have an even area to add them to. You can skip this if you want.
Also, if you'd rather use that light grey inside mouth piece instead
of the red, this is where you'd add it.

 Next, the teeth. I suggest gluing the bottom teeth first then
the top teeth.

 Over that, the light grey piece.

 Glue the eyes and you're done!

You'll notice that on my sample, I've added white dots to the eyes.
This is totally optional. Speaking of the eyes, in the kit, they are
stuck with repositional tape to a bit of copy paper. 
If you happen to lose one or both, just fill in the eyes with
a black marker. Easy peasy!

I hope that you come out tomorrow to Photo Scraps
for Demo Day To Go, or you can order kits by email!
It runs from 10 am to 2 pm. 
 Help support a small business!
 
 Thanks! Have a great day!


Supplies for Getting Old card:
Stamps: Crafter's Companion - Getting Old
Ink: Memento - Tuxedo Black, Rose Bud
DP: Pebbles - Live Life Happy
CS: white
Accessories: Gemini; Penny Black - Swirly Stitches die; MISTI; PFS - blending brush
Adhesives: SA by 3L - tape runner, 3D foam squares

Supplies for Shark card:
Stamps: MFT - Sharky Sentiments
Ink: Versamark
DP: Photo Play - Summer Daydreams
CS: black, white, dark grey, light grey, red
Accessories: Gemini; Taylored Expressions - Frayed Edge die; MFT - Baby Shark die; Stampendous - white EP; heat gun; MISTI; Sakura - white Gelly Roll pen
Adhesives: SA by 3L - tape runner, 3D foam squares; Ranger - MMM

Thursday, January 9, 2020

Cute penguins? Yes please!

Hello and happy Thursday to you!
I have another Christmas card to share. (I know, I'm just
as surprised as you are)


 I'm not sure how long this will last, but I'm trying to actually use my supplies
instead of just hoarding them. LOL! When I trimmed the mountain paper to size,
I didn't pay particular attention as to where it might show up in the circle die cut.
But with sheer dumb luck, you can see it peeking out behind my happy penguin.
I adhered a snippet of white card stock to the inside bottom of the cut out to ground
my little friend. The white panel, and penguin have been adhered with foam squares,
as is the sentiment strip.


Here's the finished inside:


I think now I really must concentrate on making birthday cards, as I'm
dangerously low on them. (But there may be more Christmas cards
showing up here too. It could happen. *wink*)

Thanks for visiting. Have a great day!


I'd like to enter this at:
ABC Christmas Challenge - B is for Bingo (patterned paper/lots of layers/die cuts


Supplies:
Stamps: Avery Elle - Polar Playtime
Ink: Memento - Tuxedo Black
CS: SN: Bazzill; Core'dinations
DP: American Craft - Jack Frost
Accessories: Spectrum Noir markers; Gemini; Avery Elle - Polar Playtime dies; Penny Black - Stitched Circles dies; Nuvo Glitter Drops - White Blizzard; MISTI; red Prismacolor pencil (on inside candy cane)
Adhesives: SA by 3L - tape runner, 3D & thin 3D foam squares
adding pinterest script 3. Changing the Position of the Pin it! button The cool thing about this code is that you have some freedom over where the Pinterest button for Blogger will go over the image. Take a look at the code that you just copied and pasted into the HTML for the word 'center'.