Friday, August 16, 2013

Trick or Treat.../MojoMondays#306/Unity FWF

Hello and happy Friday! It's been so beautiful these last few days that I haven't really done much in the way of housework. (It's over rated anyway. Besides, it's not going anywhere!) But I have been enjoying sitting out on the deck and reading. When I'd take a break from that, I'd go to my craft cave and make awesome sh*t! For real. See?:


Anyone else get this sign from Unity? It spoke to me, so I had to get it! LOL! Some quick work with a picture frame hanger on the back and it's proudly hanging in my craft cave! Woo Hoo!

Anyhooo, my evil doublemint twin Jessi sent me some kick-ass goodies, one of them being these crocheted mats that she makes herself! Super cool, right?!! She is so talented! After a couple days of admiring them, I felt I needed to actually USE them! So here is what I came up with:


Here's the inside...
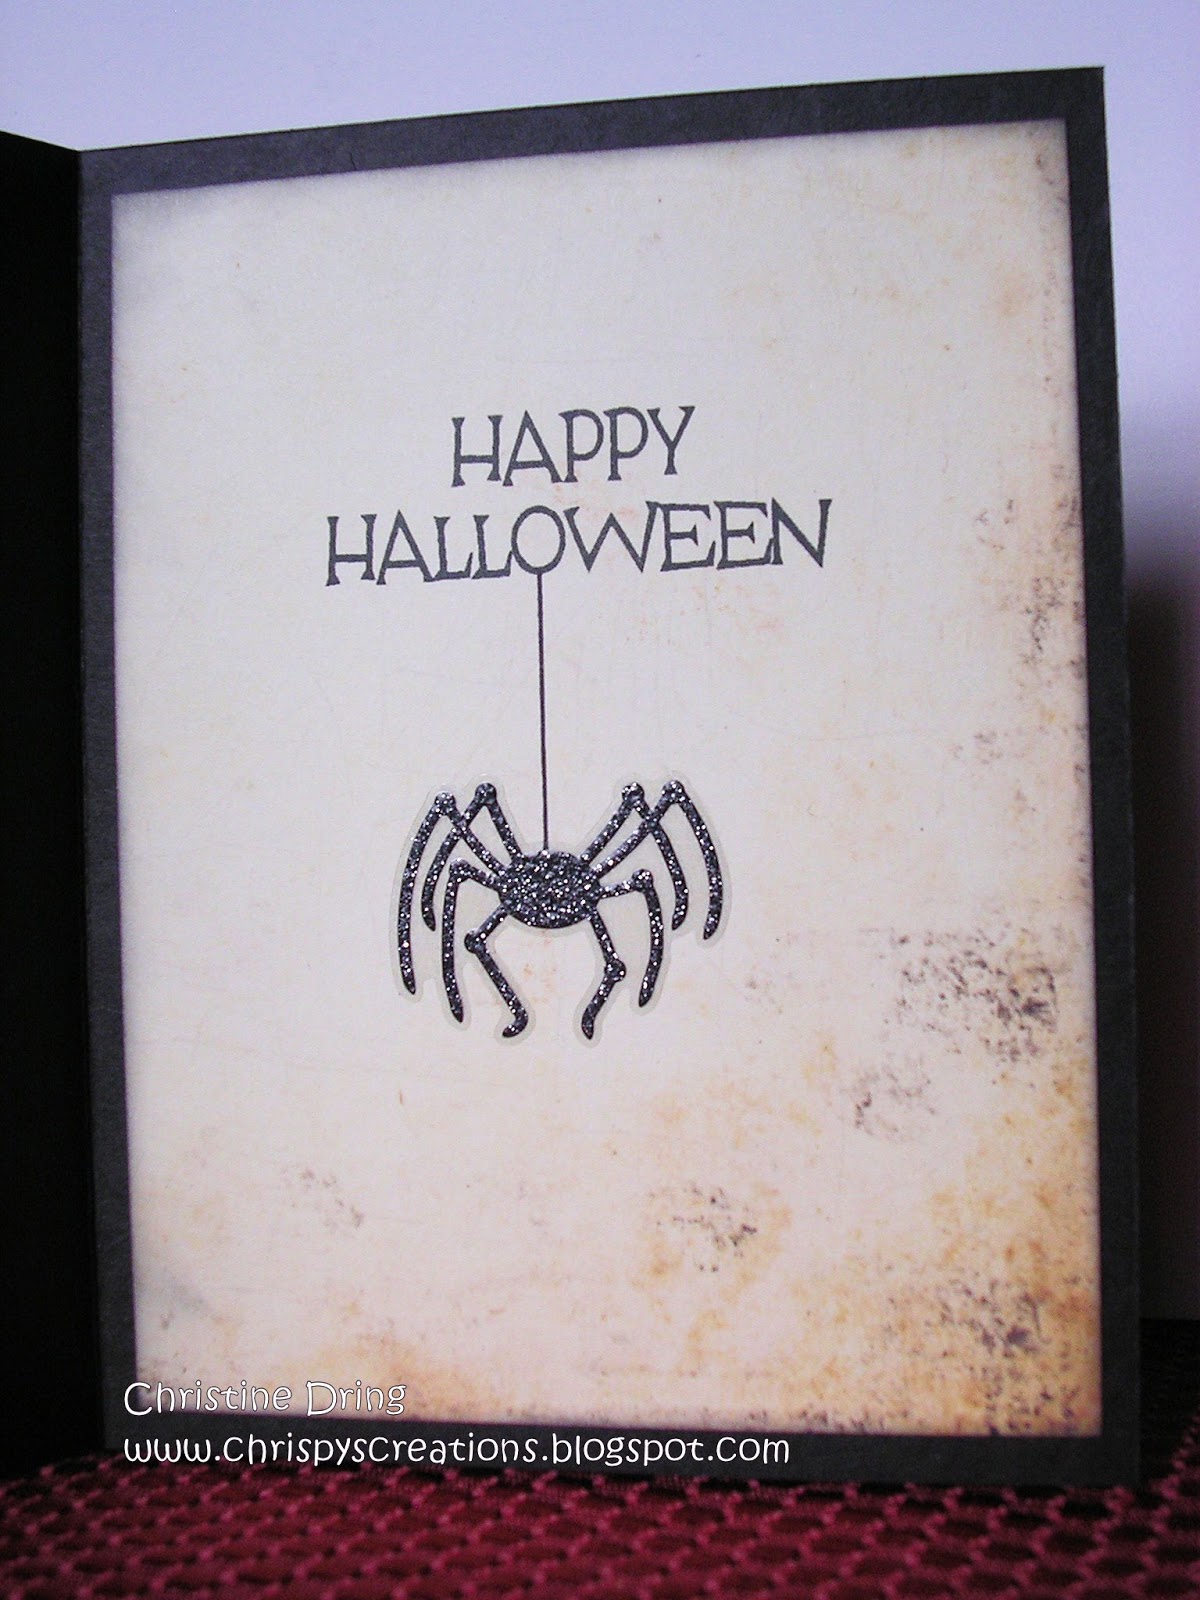

I based my card from the Mojo Mondays #306 sketch:


I'm also going to enter this for Unity Stamp's Friends With Flair. The jack-o-lantern was stamped, colored, fussy cut and adhered with foam squares. I die cut the banner then stamped trick or treat and that was adhered with foam squares as well. The spider sticker was clear, but I rubbed some powder on the back to get rid of the stickiness. It made it look like vellum, pretty cool! It's also adhered with a foam square.

Hey, if you like these crocheted mats, Jessi has them for sale on her blog: OneCraftyMama, in different sizes, shapes and colors! Go check it out! Thanks again Jessi! Love ya girl! MUAH!

Thanks for stopping by! Now go get your craft on! (or your drink on. It IS Friday, after all!) LOL!

Chris
Supplies:
Crocheted Mats made by Her Most Supreme Awesomeness, Jessi Fogan!
Stamps: Unity - October 2012 KOTM; Hero Arts - Celebrate Everyday
Ink: Staz On - Jet Black; Memento - Tuxedo Black; Clear Snap - Charcoal
DP: Authentique - Enchanted
Card stock: Recollections
Adhesive: SA by 3L - MyStik, 3D foam squares
Accessories: Spellbinders Grand Calibur & Lg Standard Circle Nesties; Paper Smooches Streamer Die; Marvy Uchida markers; Anna Griffin border sticker; Martha Stewart spider stickers

When Pigs Fly..../PS Sparks-Aug. Designer Draft

Guess what? I made a card and am entering it a couple days before it's due. Instead of the hour before on the day it's due. Please don't fall off your chair. ☺ This is for the current Paper Smooches Sparks - Designer Drafts challenge:


Here's the inspiration sketch:


Look! Pigs CAN fly!!! With the help of a kite! LOL! I stamped, colored and fussy cut that cute little piggy. She's adhered with foam squares, as well as the kite. I carefully cut around the pig's mouth with an X-Acto knife so I could fit the twine under it. It sort of worked. Like she's holding onto the kite tail with her mouth. But just in case she wants to squeal in joy, she's also holding on to the it with her front hoof!

You may have noticed that there's not a picture of the inside. That's because I didn't finish it yet. (Gasp!) I couldn't decide if this was going to be a birthday card or a congrats card, so I left it blank. I'll stamp the inside when I send the card out. Easily done!

Thanks for stopping by and have a great day!

Chris
Supplies: Paper Smooches - Green Acres, Sunny Side Up, Chubby Chums
Ink: Memento - Tuxedo Black
DP: Graphic 45 - Bohemian Bazaar
Card stock: Recollections
Adhesive: SA by 3L - MyStik, 3D foam squares; Helmar 450 glue
Accessories: Spellbinders Grand Calibur; Paper Smooches Cloud Dies; Cuttlebug EF- lines from the James' set; Doodlebug twine; Marvy Uchida markers; Fiskars corner rounder

Wednesday, August 14, 2013

Frazzled?.../CTS#40 & CFC#111

I don't know where you live in your neck of the woods, but here in my corner of the country, it is beautiful outside!! A cold front moved in overnight, and it's in the low 60's, a sunny, gorgeous morning! I have a feeling that I'll be outside on the deck most of the day today. ☺

Well, now that you have the weather report (grin), let me share with you a card I made for both CAS(E) this Sketch #40 and CAS-ual Fridays #111:


Here's the inside:


And the challenges:


Isn't she cute? This Itty Bitty is called Frazzled, so that became my sentiment. She's colored with Marvy Uchida markers, fussy cut and adhered with foam squares on the main panel. I picked that patterned paper because I thought it added to the frazzled theme! I also added Glossy Accents to her button eyes. A couple more stamps to the inside and I was done!

Thanks for stopping by! Keep on crafting and have a great day!

Chris
Supplies:
Stamps: Unity - Frazzled Itty Bitty, that stinks from Ah Crap set; Studio G - alphas; Hero Arts - Everyday Sayings
Ink: Staz On - Jet Black; Memento - Tuxedo Black
Strathmore water color paper
DP: Basic Grey - Persimmon
Card stock: DCWV
Adhesive: SA by 3L - MyStik, 3D foam squares; Glue Dots
Accessories: Marvy Uchida markers; Glossy Accents; Fiskars pinking shears; DMC floss; button from my stash 

Sunday, August 11, 2013

Boo!.../PS Sparks Trend Watch Challenge: Sheer and Clear

This one stumped me. I admit it. I had absolutely no idea what to do with this challenge. And then I watched Savannah's video about transparencies on the Virtual Smooches blog. Then I got to thinking. Then I got an idea. Or two. This card was one of them:


...the inside:


...and the inspiration photo:


I got to thinking that ghosts were kinda sheer. So I found my little ghostie stamp and stamped her on vellum! (I believe she's a she because of those thick eyelashes!! LOL!) I die cut and adhered a Paper Smooches shopping bag and after fussy cutting her, I adhered her with some foam squares. Made to look like she's jumping out of the bag, hence the "BOO!" sentiment! I used the negative of the Labels 14 Nestie and finished the inside. (Use those negatives! Don't throw 'em away!)

Well, that's all I have for now. I may have to go back up to my craft cave and make something else. (grin!)
Have a great evening and thanks for stopping by!

Chris
Supplies:
Stamps: Paper Smooches - Spookalicious, Graffiti, Birthday Sampler (exclamation point); Hero Arts - Celebrate Everyday (Happy Halloween)
Ink: Staz On - Jet Black; Memento - Tuxedo Black
DP: Basic Grey - Persimmon
Card stock: Recollections (kraft); DCWV (smokey gray)
Adhesive: SA by 3L - MyStik; Scotch Scrapbooker's Glue; Recollections - foam squares
Accessories: Spellbinder's Grand Calibur & Labels 14 Nestie; Paper Smooches - Shopping bag die; Recollections vellum

Saturday, August 10, 2013

Drunken Stampers #136 - Place: A Beach

Good Morning and happy Saturday to you! It's time again for another challenge at Drunken Stampers! For this term, the challenges will be either a person, a place, or a thing, and will alternate each week! How cool is that?!! You can create a project using the main objective, or the sub title, or go bold and use BOTH! HA! This week's challenge is a Place: A Beach, with the option to use water/the beach/tropics as your theme.


Team Tropical Hooters (Love that name! Our team names are based on drink names! LOL!) is up to bat this week to amaze you with their crafty genius! Here is what I came up with:


Here is the inside:


This was such a fun challenge to create for. Mainly because the beach IS my Happy Place! There's nothing more relaxing than parking your butt in a beach chair with the sun on your face, the smell of the salty breeze and suntan lotion, the sound of the waves crashing on the shore, and a cold drink in your hand! LOVE LOVE LOVE!!

I wanted to create a scene for my card, and since I have a ton of beach themed stickers, I went to town using them! The background panel was made with scraps of blue card stock and two different patterned papers to mimic sky, ocean, and sand. After those were adhered, I just picked a bunch of dimensional stickers to make the scene. Even though the umbrella already was sticky on the back, I only adhered the pole directly to the back panel, but used foam dots on the umbrella. (I wanted the top of the chair to fit under the umbrella.)  I die cut some clouds and adhered, and stamped the sentiment. Finished the inside with another sentiment and a pair of sunglasses and I was done!

I hope you have the chance to play along with the Drunken Stampers this week! Oh, and don't forget to check out what my Tropical Hooters teammates came up with! You won't be disappointed!!

Thanks for stopping by and I hope you have a fabulous day!!

Chris
Supplies:
Stamps: Paper Smooches - Get Outta Town
Ink: Memento - Nautical Blue
DP: DCWV (tan); EK Success (blue)
Card stock: Recollections
Adhesives: SA by 3L - MyStik; American Crafts - foam dots; Elmer's extra strength glue stick
Accessories: Grand Calibur; Paper Smooches Dies: Clouds, Borders 1; Jolee's - various stickers; Fiskars corner rounder

Friday, August 9, 2013

Bad to the Gills!.../SBS July Facebook Fan Page challenge

Once again, I'm entering a challenge at the 11th hour. But I couldn't think of what to do until last night! Betty from Simply Betty Stamps has a Facebook Fan Page contest where she generously gives you a digi image for free (I know! Cool Beans!), but there are two catches: 1) you have to be a member of the Facebook Fan Page and 2) you must use the free image for the contest it was designed for. (Seriously, it's a no brainer!) For July's contest, she offered two images to choose from - Roxie the Good Mermaid and Spika the Bad Mermaid. Which one did I pick? Well duh! Spika, of course! LOL! Here's what I came up with:


I made a tag! This, I think, is going to be my new bookmark! HA! Meet Spika, the Bad Mermaid! (She's really not bad, just drawn that way! LOL!) Ok, I know this is not the best coloring job, mainly the tail fins. There are a couple new things I've tried out on this tag. First, I finally bought alcohol based markers! (I have Marvy Uchida markers, which are water based) Thought it would be easy to use my new Spectrum Noir pens - not! They react differently than the M.U's do, especially when using the blender pen. I only have the essentials and pale hues sets, which I used for the skin, tail fin, and hair. The green is M.U. (I strongly hinted to my hubby that I'd like the rest of the sets for my birthday present! We'll see how that flies! HA!) Secondly, I tried the Fran-tage technique for the first time! I sprinkled champagne EP and Gilded & Tarnished Mica flakes at the bottom of the tag, then heated it from underneath. Worked like a charm! Spika is popped up on foam squares. Oh, and before I did ANY of that, I smeared my craft mat with distress inks, spritzed with water and layed my tag into the mess. Once dry, I printed the sentiment from my computer.  OH, OH! Thirdly, I used a water pen for the first time around the tag hole, since it didn't touch the ink at first. Here's a different angle so you can see the shiny EP and Mica flakes better:


I finished with some baker's twine and some rain dots to mimic air bubbles and was done! A cute little underwater scene. Except for the crappy coloring job on the fins, I LURV how this turned out!

Well, that's it for now. Thanks for hanging on till the end of my post. For that you deserve an ice cold beverage of the alcoholic kind! LOL! Have a great day!

ETA: I'm also entering this for the CAS on Sunday #14 - Tag it challenge! Thanks Barb!

Chris
Supplies:
Stamps: SBS - Spika digi
Markers: Spectrum Noir; Marvy Uchida
Ink: Ranger DI - Broken China, Peeled Paint, Vintage Photo
Strathmore water color paper
Adhesives: SA by 3L - foam squares
Accessories: tag from my stash; Cloud 9 Designs - Rain Dots; Doodlebug twine; Stampendous - Champagne EP, Gilded & Tarnished Mica Flakes

Wednesday, August 7, 2013

MFW - Birthday Party Invitations Challenge

Hi there and happy Wednesday! I'd like to share with you a project that I was working on a couple weeks ago. I received a call from my nephew and niece one night asking if I would make custom invites for them. Their twins are turning 1 years old next month and they are throwing a Mickey and Minnie themed party for them! Fun! I jumped right on that request! (I edited my pictures to blur out any private information. That's why they look funky!) Here is the finished invite:


Yep, a totally paper crafted custom invite! Well, 50 of them! All stamped, colored, die cut, printed, corner rounded and trimmed by hand (well, with a paper trimmer)! From start to finish, it took me a week to get them done and shipped. (Oh, did I mention we live in different states?)

The day after getting the call, I went searching for anything with Mickey and Minnie on it. (I went to three different craft stores, you know, to see what they all had available. May have picked up things at all three stores....wink wink!) I found this stamp set that had this image on it. Score! I whipped up 3 samples for them, took some pictures, and emailed the pics for them to look over, the above was the one they went with. Once I got the go ahead, I got down to it!

 (all stamped and colored)

 (this Nestie got A LOT of use!)

 (I only have the Classic Ovals Lg Nesties, couldn't find the Small Nesties at all. What's a girl to do? 
Take same oval and trace the inner edge on the back of your images! Then cut them all out by hand! 
Yep, that's me, using my dining room window as a light box! LOL!)


(invites all printed out and beginning to trim them to size)

 (After trimming everything to size, I went into assembly line mode!)

(And of course, the envies had to match!) 

(The finished product!!)

And there you have it. A very photo filled post about super cute invites! (Yeah, I still am patting myself on the back from time to time! LOL!) 

Thanks for reading until the end, and if you haven't already done so, why not try your hand at Moxie Fab World's Birthday Party Invite challenge?! 

Have a fantastic day!

Chris
Supplies:
Stamps: EK Success - Mickey and Minnie
Ink: Staz On - Jet Black
Card stock: Darice
DP: Echo Park - Metropolitan Dots & Stripes
Adhesives: SA by 3L - EZ Runner
Accessories: Grand Calibur; Classic Ovals Lg. Nesties; Marvy Uchida markers; Fiskars corner rounder and trimmer; Sakura white Gelly Roll pen; printed from computer


MFW - Trendy Triangles challenge/Simon Says Stamp - Triangle challenge

Good Morning all! I was getting crafty yesterday in the ol' craft cave, and I came up with this little number for the Moxie Fab World's Trendy Triangle challenge, and the Simon Says Stamp Triangle challenge:


Here's the inside:

A pinwheel made from layers of triangles? Get Out! No Way! Yep! Way! Woo Hoo! Fun with geometric shapes! LOL! There are some really awesome entries for these challenges. I hope you get to play along too!

It's still overcast and rainy in my neck of the woods. But that's ok - that means I don't need to break out the hose to water the plants! ☺ Thanks for stopping by and I hope you have a great day!

Chris
Supplies:
Stamps: Paper Smooches - Birthday Sampler, Digits
Ink: Memento - Gray Flannel
DP: Graphic 45 - Bohemian Bazaar
Card stock: Recollections (white, blue); Paper Smooches (pink)
Adhesives: SA by 3L - MyStik, 3D foam squares; Glue Dots
Accessories: Slice Die Cutting Machine & Basics 1 cartridge; Grand Calibur; Epiphany Crafts round 25 tool; Cuttlebug EF - Swiss dots, Arrows from the James Set; rhinestone from my stash

Sunday, August 4, 2013

For You.../PS Sparks Anything Goes/DD Wanna Sketch#7

Apparently, if you are severely lacking sleep, like my Evil Doublemint Twin, Jessi Fogan is, you come up with brilliantly amazing card creations...then go on my Facebook page and brag about it, and how you used 9 different stamps from Paper Smooches, and tell me to "Bring It!"

Well.

OK.

If you insist:


Here is the inside:


12 different stamps sets, 3 different die sets, and the blue paper is even from Paper Smooches.

I believe, as you say, brought it!

Yes, it's a little garden scene. Yes, it's anything but clean and graphic (my go to kind of card making). Yes, it's chaotic, and I love it! (Besides, Nature is chaotic, so why not go with that?!)

I'm entering this for the current Paper Smooches Sparks challenge: Anything Goes.


This is also very loosely based on Dahlhouse Designs Wanna Sketch #7


For the focal panel, I made a trellis from the Basic Lattice Nesties. I trimmed it to size, then cut strips of card stock to frame it out. (Pretty cool, huh?!) Then I covered it up with leaves, flowers, bugs and a birdie! (And yes, one of the leaf die cuts I flipped over and drew the leaf in with a marker - I wanted it to point the other way.) After the trellis was done, I adhered the grass die cuts with foam squares. I stamped, colored and fussy cut the mushroom and snail then adhered them to the grass. Finished the inside and that was all she wrote!

Thanks for stopping by and make sure you stop by Jessi's blog to see her incredible card!

She totally kicked my ass!

Chris
Supplies:
Stamps: Paper Smooches - Birthday Sampler, Reflections (leaves), Daisies & Paisleys (flower), Needle Little Love (flower), Spring Fling (flower), Crystal Clear (firefly), Hubby & Wifey (flower), Green Thumb (bee, snail), Get Outta Town (flower), Flap Happy (butterfly), Forest Whimsy (mushroom), Woofers & Tweeters (birdie)
Ink: Memento - Tuxedo Black, Tangelo, Rhubarb Stalk, Bamboo Leaves, Gray Flannel; Ranger DI - Peeled Paint
Card stock: Paper Smooches - Lily Collection (blue); Recollections (white, greens)
DP: various scraps
Adhesives: SA by 3L - MyStik, 3D foam squares; Elmer's extra strength glue stick; Glue Dots
Accessories: Grand Calibur; Spellbinder -Basic Lattice Nestie; Paper Smooches Dies - Clouds, Butterflies 1, Reflections Leaves; Marvy Uchida markers; Jolee's By You - grass diecuts

Saturday, August 3, 2013

Drunken Stampers challenge #135

The Drunken Stampers are back!! Woot! Woot! This term our challenges are going to be based on a person, place, or thing! Team Yellow Canary is up this week to dazzle you with today's challenge #135 - Person: Athlete (you can use any sport as your inspiration!)


I hope that you all get a chance to play along with us! So kick back, relax and twist off the top of a cold one! LOL! Come check out the Drunken Stampers blog and see for yourself!

Have a great day!

Chris
adding pinterest script 3. Changing the Position of the Pin it! button The cool thing about this code is that you have some freedom over where the Pinterest button for Blogger will go over the image. Take a look at the code that you just copied and pasted into the HTML for the word 'center'.