Thursday, June 7, 2018

STAMPlorations 5th Birthday Celebration!


Hi crafty peeps and welcome!
I'm super excited to be participating in
The festivities are over the top, with link up parties, prizes, freebies, flash sales,
and lots of inspiration from the STAMPGirls!!

I'm so grateful to Shery for first allowing me to be a guest designer last
year, then inviting me to be a regular designer on the Theme & Sketch design team!
Your generosity is unparalleled, and you have the kindest, biggest heart!
Big squishy hugs to you!

Today, I'm sharing three of my favorite projects along with a 
new project:
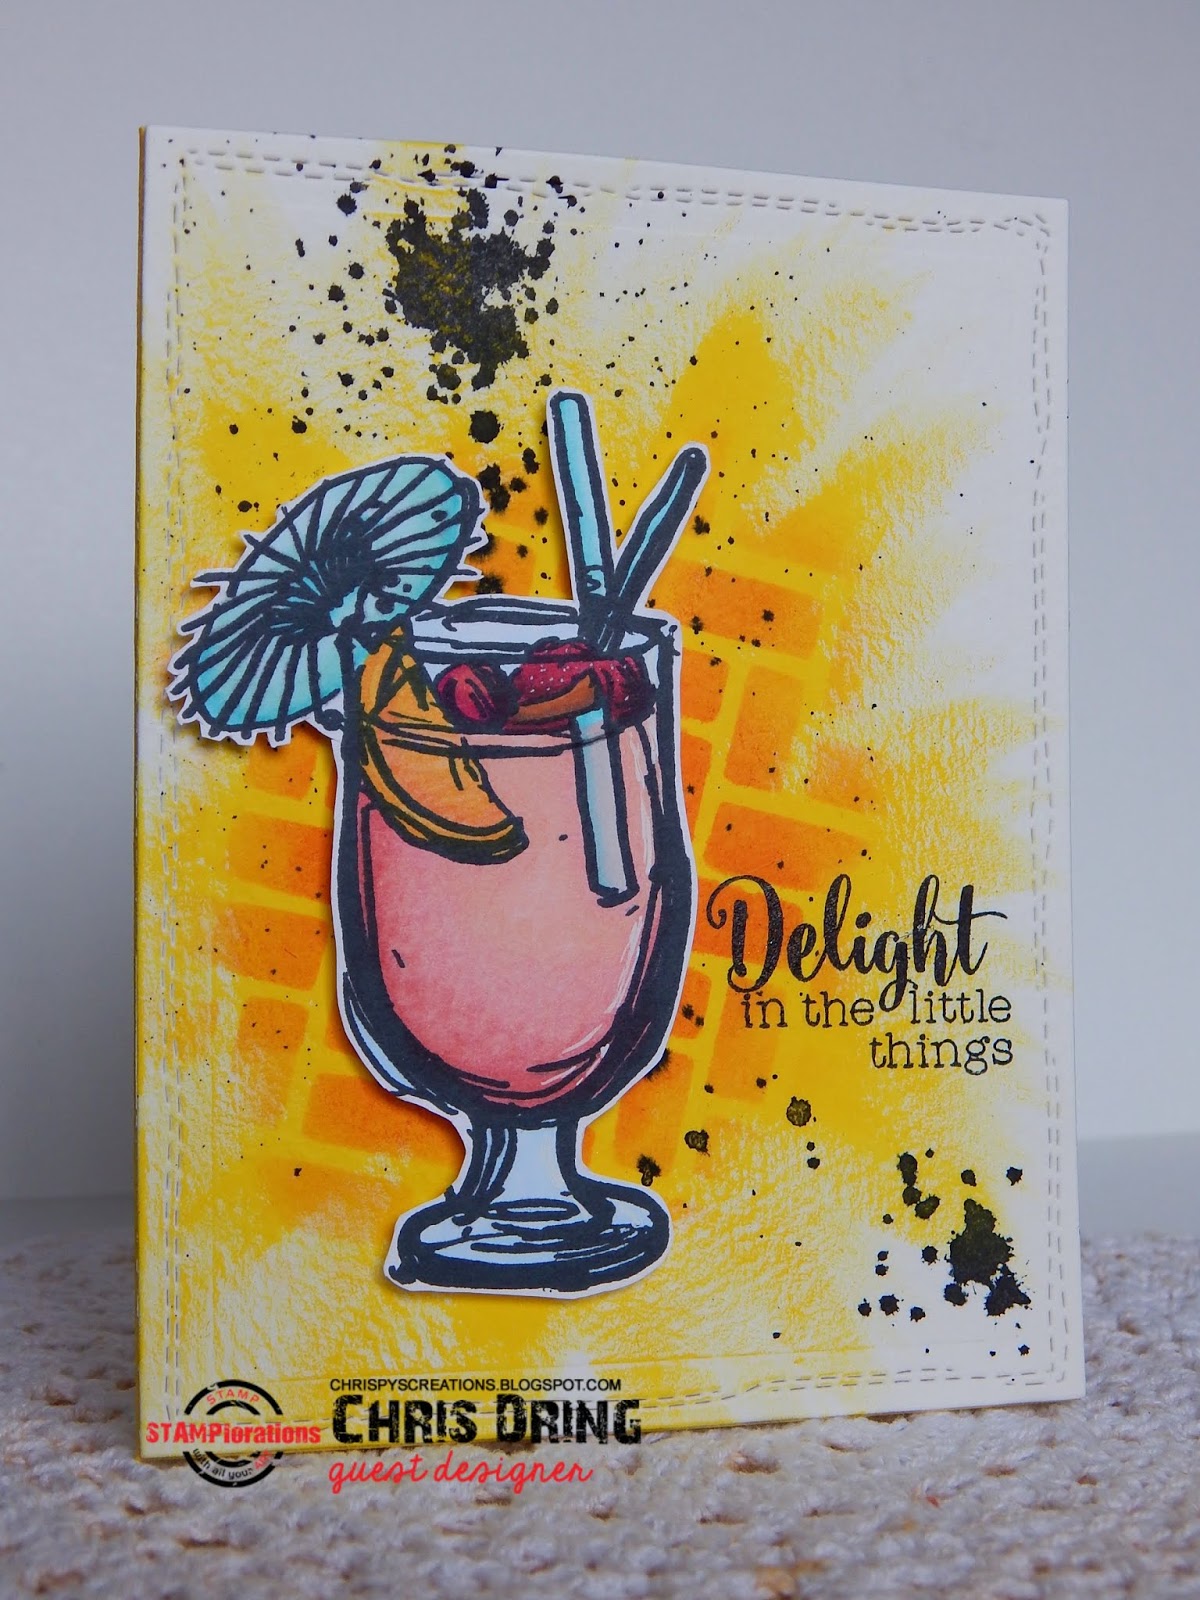

(This one is very special to me as it's the first card I 
made as a guest designer!)


I can't say I have a set style as I love to try different things. LOL!
The closest I can come to is maybe clean and layered.
Speaking of trying different things, here is my new card,
incorporating part of a Gelli print that I made a couple weeks ago.
This print uses the Layered Petals stencil.
 It's die cut using the Crazy Double Running Stitch Rectangle Nesting dies from a larger print.
 I've used various stamps from
the Art Marks, Artsy Border Makers, and A Snarky Birthday To You sets.


and the inside:

Ah, snark. I loves me some snark! LOL!

Let's see what you can do now! I'd love to see you case one of my cards shown above,
and link it up on The STAMPlorations blog. Don't forget to link up your wishlist and 
comment on the designer's blogs for more chances at winning some great prizes!
Feel the need to shop? How about a discount?
Use STAMPGIRLCHRIS for 20% off!

Thanks for visiting, and I hope that you have a great day!


Tuesday, June 5, 2018

SHOPPING OUR STASH # 357 - My Favorite Things


 Hiya and welcome!
This week at SHOPPING OUR STASH,
is all about a few of your favorite things. Could be a favorite stamp,
technique, embellishment, papers, holiday, etc.
Show us a few of your favorite things on your projects!

 Here's my card:


and the inside:


My favorite things on this card: 
Halloween - my favorite holiday!
Grumplings stamps by Taylored Expressions
Coloring, this with Prismacolor pencils
And of course, a bit of snark! LOL!

But wait, I have a two-fer:


and the inside:

My favorite things on this card:
Wine!
Coloring, this time with Spectrum Noir markers
CAS cards - I know, they are growing on me
Did I mention wine?

So what are a few of your favorite things to add to your projects? We'd love
to see them. Just link up at Shopping Our Stash so that we can
admire your work! For more great ideas, do check out what my teammies
 have deemed their favorites, and leave some bloggy lovin while there!
Thanks for visiting, and I hope you have a great day!


Supplies:
Halloween card:
Stamps: Taylored Expressions - Grumplings in Costume; Hero Arts - Celebrate Everyday
Ink: Memento - Tuxedo Black
DP: G45 - An Eerie Tale
CS: Thunderbolt; Bazzill; scraps
Accessories: Prismacolor pencils; Faber Castell - black artist Pitt pen; GC: SB - sm and lg standard circle nesties, Oval Bliss nesties; TE - Grumplings in costumes dies; EK Success - Deco Scallop Edger; MISTI
Adhesives: SA by 3L - tape runner, Thin 3D foam squares

Wine card:
Stamps: Dare2BArtzy/Tracey Weinzapfel - Always Wine Time; Avery Elle - Cheers
Ink: Memento - Tuxedo Black
CS: Crafter's Companion; Neenah
Accessories: Spectrum Noir markers; MISTI; Recollections - washi tape; Sakura - white Gelly Roll pen; Fiskars - corner rounder
Adhesives: SA by 3L - Thin 3D foam squares

Saturday, June 2, 2018

SISTERHOOD OF SNARKY STAMPERS #111 Y is for Yummy


Hello snarky ones!
It's time again for a new challenge at the

This fortnight's theme is all things Yummy! Be that cake, burgers, donuts, etc,
we want to see your yummy creations!
Here's my take on it:


 and the inside:


Such a pretty image...and then I went and added a snarky sentiment. (grin!)
I grabbed an ancient paper collection, and that was my inspiration for the colors I
chose to use. Her party dress and bits of the cake are winked by Stella,
but of course, you can't see it in this pic.

Now it's your turn to show us what is yummy to you, make something and link
up at the Sisterhood of Snarky Stampers! For more idea, do yourself a
favor and check out what my Sisters have created!
Thanks for visiting. Have a great day!


I'd like to enter this at Seize the Birthday - patterened paper


Supplies:
Stamps: Unity - Fashionista Sabrina; Taylored Expressions - Another year older
Ink: Memento - Tuxedo Black
CS: Neenah; Darice; Crafter's Companion
DP: Teresa Collins - Tell your story (2012)
Accessories - Spectrum Noir markers; GC; Lawn Fawn - scalloped rectangle dies; Wink of Stella pen; MISTI
Adhesives: SA by 3L - tape runner; 3D & thin 3D foam squares

Tuesday, May 29, 2018

SHOPPING OUR STASH #356 - Pomp and Circumstance


Hello friends and welcome!
It's time for our next challenge at
Since it's that time of year for students graduating, we want to
see your Graduation cards. But, if you don't need one, as an alternative you
can just create a Congrats card. Options! Yay!
Here's what I came up with: 


 and the inside:

This was pretty simple to make. Using just two card stock colors, an embossing folder
and some ancient stickers from my stash, I created this simple yet
elegant graduation card. The stamped sentiment on the inside finishes it off.

I hope that you'll find some time this week to play along at our challenge
at Shopping Our Stash! We'd love to see what you create. Looking for more
ideas? Simply visit the blogs of my teammates to see what fabulous designs they made!
Thanks for stopping in. Have a fantastic day!


Supplies:
Stamps: Paper Smooches - Slang Gang
Ink: Memento - Tuxedo Black
CS: Neenah; Bazzill
Accessories: Momenta and Sticko - stickers; GC; Sizzix - Dots EF; MISTI
Adhesives: SA by 3L - tape runner, Thin 3D foam squares

Thursday, May 24, 2018

Spotlight Project #2 on the STAMPlorations blog!

Hi crafty peeps!
I just wanted to let you know that I have another
Spotlight Project over on the

Here's a little sneak peek at my card:


I'd love it if you'd visit the STAMPlorations blog to see my
project in full!

Thank you so much!


Wednesday, May 23, 2018

Older, yes. Wiser, meh.

Hello crafty peeps!
I needed a male birthday card to send, and of course, didn't have
any readily made.
So, this happened:


and the inside:

This came together relatively quickly. (Heh, see what I just did there?)
I die cut the stitched frame twice, from navy and white card stock, then stamped
Einstein on the white circle center. The sentiment was stamped, trimmed to size then
a navy mat added. Before adhering, I stamped the texture stamp repeatedly on the card base
in grey ink, stamping off once for a more subtle image. The inside sentiment was
stamped, then I used the texture stamp over it to tie in with the front.

That's it for now.
We are having another gorgeous, sunny day today, and I
want to go out and enjoy it!
Thanks for visiting. Have a great day!


I'm entering this at Just Us Girls #441 


Supplies:
Stamps: Viva Las Vegas Stamps - Einstein; Taylored Expressions - Another year older;
Indigo Blu - Tasty Textures
Ink: Memento - London Fog; Color Box/Susan K. Weckesser - Ice
CS: Neenah; Taylored Expressions; scraps
Accessories: GC; MFT - Stitched circle frame die; MISTI
Adhesives: SA by 3L - tape runner, Thin 3D foam squares; Ranger - Multi Medium Matte


Tuesday, May 22, 2018

SHOPPING OUR STASH #355 - April Showers Bring May Flowers


Hi there and happy Tuesday to you!
Today starts a fun new challenge at
we want to see a flower (or flowers) on your projects!
 
I tried out a stencil that I won last year but this was the first time I used it:


I smooshed some Distress Inks onto my craft mat, then mixed embossing paste into the ink.
I applied the green first, then the pink. Once I had covered the stencil, I carefully swiped the
excess paste off, making sure to blend the green into the pink. When you lift up the stencil,
you have a subtle blending of the colors.

I left it to dry overnight, then simply matted it with a scrap of green DP, heat embossed
the sentiment, adhered it all on my card base, and added some sequins for 
a bit of extra bling.

I hope that you get a chance to play along with our flower challenge
at Shopping Our Stash! We look forward to seeing what you come up with!
For more ideas, do check out the fabulous creations by my teammies, and
leave them some bloggy love while there.
Thanks for visiting!


Supplies:
Stamps: So Suzy Stamps
Ink: VersaMark; Ranger DI - Mowed Lawn, Worn Lipstick, Candied Apple
CS: Neenah; scraps
DP: HOTP
Accessories: FABScraps - DS036 stencil; Dreamweaver - Embossing paste; pallet knife; Stampendous - detail white EP; heat gun; Darice - sequins; GC; Avery Elle - pierced rectangle die
Adhesives: SA by 3L - tape runner, Thin 3D foam squares; Ranger - Multi Medium Matte

Monday, May 21, 2018

Holiday Wishes

Hello!
Over the weekend, I broke out the Prismacolor pencils and had
 some fun coloring this gorgeous image, with the current
challenge at Muse: ChristmasVisions #100 in mind:


and the inside:

 Here's the Muse card by Chriss:
 

I heat embossed the image in gold and colored with my Prismacolor pencils.
As much as I liked the center flower in cream colors, for my card I colored
all the flowers red, but the candles are cream. As with the Muse card,
I colored around the image in blue. I opted to just stamp the sentiment using
gold ink but not heat embossing it.

 Here's another picture of my card showing the shiny embossing;


That's it for now. Thanks for visiting, and I hope you have a great day!


Supplies:
Stamps: STAMPlorations - Christmas Candle Lg; Hero Arts - Color Layering Christmas tree, Merry Christmas Message
Ink: VersaMark; Brilliance - Galaxy Gold; Memento - Tuxedo Black
CS: Neenah; Thunderbolt; Darice
Accessories: Prismacolor pencils; GC; Avery Elle - pierced rectangle die; Stampendous - champagne EP; heat gun; MISTI; Wink of Stella pen
Adhesives: SA by 3L - tape runner, 3D foam squares

Saturday, May 19, 2018

SISTERHOOD OF SNARKY STAMPERS #110 - I is for Inky


Hello and happy Saturday, snarky peeps!
Looks like Edna had a bit of fun with her reinkers! LOL!
Which brings us to our new challenge at the
I is for Inky! 
Let's see what you can do with your inks, be it stamping, sponging, using as
water color, whatever you can dream up.
I broke out some inks, stencils and stamps for my card: 


I sponged green ink through a stencil on my card base, on the blue panel I stamped
the tweed pattern. On the main panel I sponged the same green ink on white card stock then
used another stencil to add the blue dots. All that was left was to add my sentiment
and a border stamp.

I hope that you'll join the inky fun at the Sisterhood of Snarky Stampers!
For for inky ideas, do check out what my Sisters and our newest Guest Designer,
Mimi, have created for your viewing pleasure.
Thanks for visiting. Have a great day!


I'd like to enter this at:


Supplies:
Stamps: So Suzy Stamps/Crackerbox Palace - More Fingers; Hero Arts - Tweed pattern; STAMPlorations - Artsy Border Makers
Ink: Memento - Tuxedo Black, Teal Zeal; Ranger DI - Twisted Citron, Mermaid Lagoon
CS: Neenah, Darice
Accessories: Dylusions - triangle stencil; STAMPlorations - Dots All Over stencil; ink blenders; MISTI
Adhesives: SA by 3L - tape runner

Friday, May 18, 2018

STAMPlorations May Theme & Sketch Challenge Reminder


Hi there crafty friends!
Just popping in with a reminder about the
(No sketch this month, but the theme is anything with wings!)
I've made another birthday card, because, we all need them! LOL!


Here's the finished inside:

I started with a grey card base and used one of the stamps from the
Mixed Media Elements set to stamp the stripes along the one edge. I cut
a piece of DP a bit shorter than the card base and stamped the Happy Birthday
sentiment from the Balloons and Banners set using my MISTI.
I cut a banner from a scrap of DP and stamped another mixed media image around
 the edges then adhered. I had some gelli prints needing some use,
 so I used one of them to cut my dragonflies from.
The larger dragonfly was die cut using the solid die from the Dragonfly Layering Dies set
and I doodled the shape with a black PITT pen. The smaller dragonfly was stamped
from the Winged Things stamp set and fussy cut. I added some shimmer to both
with a Wink of Stella pen.

Ooh! Shimmery!

The inside uses a couple more stamps from the same stamp sets.

There's still plenty of time to link up your winged thing projects at the
to seeing what you come up with!

If any of these products cause you to go on a shopping spree at the
STAMPlorations store, feel free to use my discount code:

STAMPGIRLCHRIS

for 20% off your purchase!

 Thanks for visiting, and I hope that you have a great day!


Supplies:
Stamps: STAMPlorations - Winged Things, Balloons and Banners, Mixed Media Elements
Ink: Memento - Bamboo Leaves, Teal Zeal; Staz On - Jet Black
DP: American Crafts - Color Crush
CS: Taylored Expressions; Neenah; Recollections
Accessories: Gelli printed paper; GC; STAMPlorations - dragonfly layering dies; MISTI; Wink of Stella pen
Adhesives: SA by 3L - tap runner, 3D & Thin 3D foam squares
adding pinterest script 3. Changing the Position of the Pin it! button The cool thing about this code is that you have some freedom over where the Pinterest button for Blogger will go over the image. Take a look at the code that you just copied and pasted into the HTML for the word 'center'.