Showing posts with label Ranger products. Show all posts

Saturday, October 4, 2025

SISTERHOOD OF SNARKY STAMPERS #267 S is for Spooky


Hello snarky peeps and welcome!
Can you believe that it's October already?
A new month means a new challenge at the
No surprise here. We want to see your spooky
projects! Also, this being 
Breast Cancer Awareness Month, as an option,
use the color pink on your creation.

I decided to make an art journal page:


I went all out spooky for this page,
my inspiration being the movie, The Shining.
What started it was the two girls (Tim Holtz Halloween
Paper Dolls). I coated them with Liquitex matte gel and once
dry, colored them using a water pen and Derwent
Inktense Block 0400. I used a spiderweb stencil with
crackle paste. After it dried, I painted orange and raw umber acrylic 
paint over it. Random stamping, splatters, and gold Stickles were also added.
I added some themed paper and boarders, and finally alpha Thickers 
to spell REDRUM.
Here are some process photos:


I hope that you'll join us this month at the
Sisterhood of Snarky Stampers for our Spooky challenge!
Please do yourself a favor and check out what my 
sisters created and also our reigning Queen, Wendy! 
Thanks for visiting. Have a fabulous day!


Supplies:
Strathmore: art journal; mixed media paper w/vellum
Golden Gesso
Ranger Texture Paste - opaque crackle
Echo Park - Spooky Spiderweb stencil
DecoArt Americana - bright orange, raw umber
Stazon ink - Timber Brown & Jet Black
Indigo Blu - Tasty Textures stamps
Ranger - gold Stickles
Tim Holtz - Paper Dolls Halloween; water mister
Liquitex - matte gel
Derwent inktense block 0400
American Crafts - Thickers alpha stickers
Authentique - Enchanted papers
Recollections - Halloween boarder stickers
EK Success - Vampire die cut borders
Bearly Art glue
various brushes & pallet knife




Thursday, July 27, 2017

Tropical birthday wishes

Hiya crafty friends and welcome.
Today I figured it's about time I blogged about a card I made a few weeks ago. A card that
got my crafty mojo working again.
And I'm only blogging about it now. Sigh.
Here it is:


 and the inside:

Seriously, I don't know why it took me this long to share this card. Because it's 
very mixed media, and I love how it turned out.
The background was made using Magenta Nuance dye powders. I stenciled over it with 
embossing paste using that awesome flower stencil.
I die cut, colored and added Stickles and Wink of Stella to the pineapple and the
hibiscus flower. Love the subtle shimmer to the images!

Oooh! Shimmery!

The Happy Birthday was embossed in gold using the Digits set. 

Well, that's it for now. Guess I should get my behind in gear and do something
about dinner. LOL! Thanks for visiting!


I'd like to enter this at: 
Seize the Birthday  - no topping this time


Supplies:
Stamps: Paper Smooches - Pineapple Crush, Get Outta Town, Digits, Happy Birthday
Ink: Memento - Tuxedo Black; VersaMark
DP: scrap
CS: Strathmore Mixed Media paper; Crafter's Companion; Taylored Expressions; Bazzill
Accessories: Magenta - Nuance dye powders: Bright Yellow, Grass Green, Turquoise; 
STAMPlorations - Bold  Florals stencil; Dreamweaver embossing paste; heat gun; water mister; 
Spectrum Noir markers; Paper Smooches - Pineapple Crush dies; Stampendous - Champagne EP; 
Martha Stewart - Arch Lattice punch; Ranger - Diamond Stickles; Wink of Stella pen
Adhesives: SA by 3L - tape runner, 3D & Thin 3D foam squares; Recollections - tacky tape  

Saturday, February 4, 2017

SISTERHOOD OF SNARKY STAMPERS #77 O is for Outrageous


Get your favorite bevy and dig in, this is gonna be a photo heavy post.

This fortnight at the SISTERHOOD OF SNARKY STAMPERS, we want to see how
outrageous you can get! That's right: O is for Outrageous is our newest challenge!
It's taken me a two weeks to get this completed, and I'm not 100% satisfied
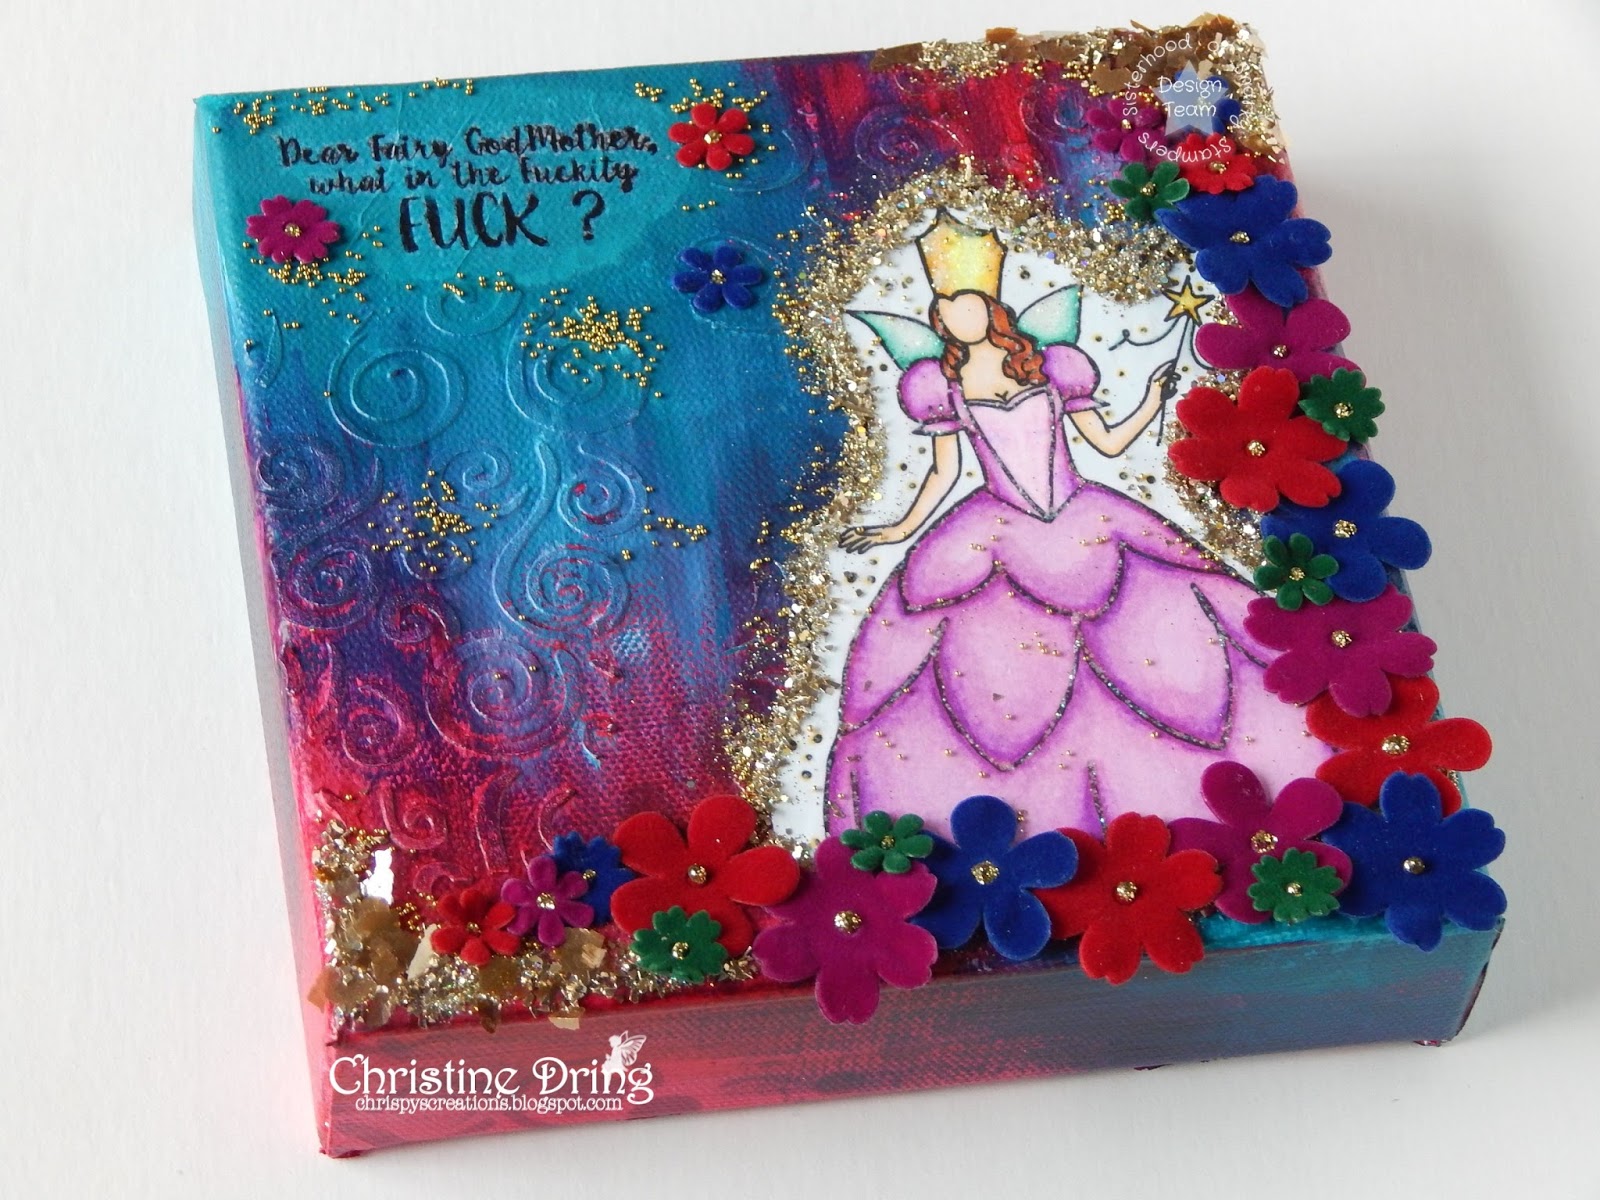
with it, but here is my mixed media canvas:


I'm not going to go into detail, but let me just tell you that I've repainted the canvas at least three times from screwing up, and after applying all that fricking glitter, almost threw the damn thing out. Oh, and those flowers took forever to glue down. After trying 3 different adhesives because the flowers weren't sticking. I finally got results with Glossy Accents, but had to do 2 or 3 at a time, and apply pressure with my fingers for at least 15 minutes each time, in order for these f*ckers to stick. 
 There's a lot going on here: gesso, acrylic paints, embossing paste and stencils, images and Spectrum Noir markers, two types of glitter, mica flakes, insanely tiny beads, velvet flowers, Stickles, ink and tissue paper from a shoe box.
Here are some more pics for your viewing pleasure:


So, ready to play in our Outrageous challenge? This is the time for you to let your
freak flag fly and go all out!! We can't wait to see what you come up with!
Just link up at the Sisterhood of Snarky Stampers so we can see it!
If you need more inspiration, just visit the blogs of my Sisters, and our newest
Guest Designer, Michelle, and leave them some bloggy lovin!

Thanks for visiting and I hope you have a fantabulous day!


Supplies:
Stamps: Unity Stamps - WTF Fairy
Ink: Staz On - Jet Black; Memento - Tuxedo Black, Gray Flannel
CS: Crafter's Companion
Accessories: AC Moore - canvas; Spectrum Noir markers; Golden - Gesso & Matte Medium; Deco Arts - Primary Magenta & Titanium White Acrylic paints; Ranger - Adirondack Stream & Cloudy Blue Acrylic paint; Dreamweaver - embossing paste; Plaid - Swirl stencil; STAMPlorations - Retro Circles stencil; The Crafts Outlet - insanely tiny gold beads; Stampendous - Halo Gold mix & Champagne Glass glitters, Gilded Mica flakes; Tissue paper from a shoe box; various paint brushes; paint sponge; Maya Road - flowers; Ranger - Gold & Crystal Stickles; Faber-Castell - black Pitt Artist Pen
Adhesives: Ranger - Multi Medium Matte, Glossy Accents


adding pinterest script 3. Changing the Position of the Pin it! button The cool thing about this code is that you have some freedom over where the Pinterest button for Blogger will go over the image. Take a look at the code that you just copied and pasted into the HTML for the word 'center'.