Showing posts with label CRAFTplorations. Show all posts

Sunday, May 15, 2022

A Tiny Craft (ATC) Challenge #9 - Flowers

 Hello and welcome back!
Today is the start of the May challenge at
This month's prompt is FLOWERS!
ATC cards or coins are welcome.

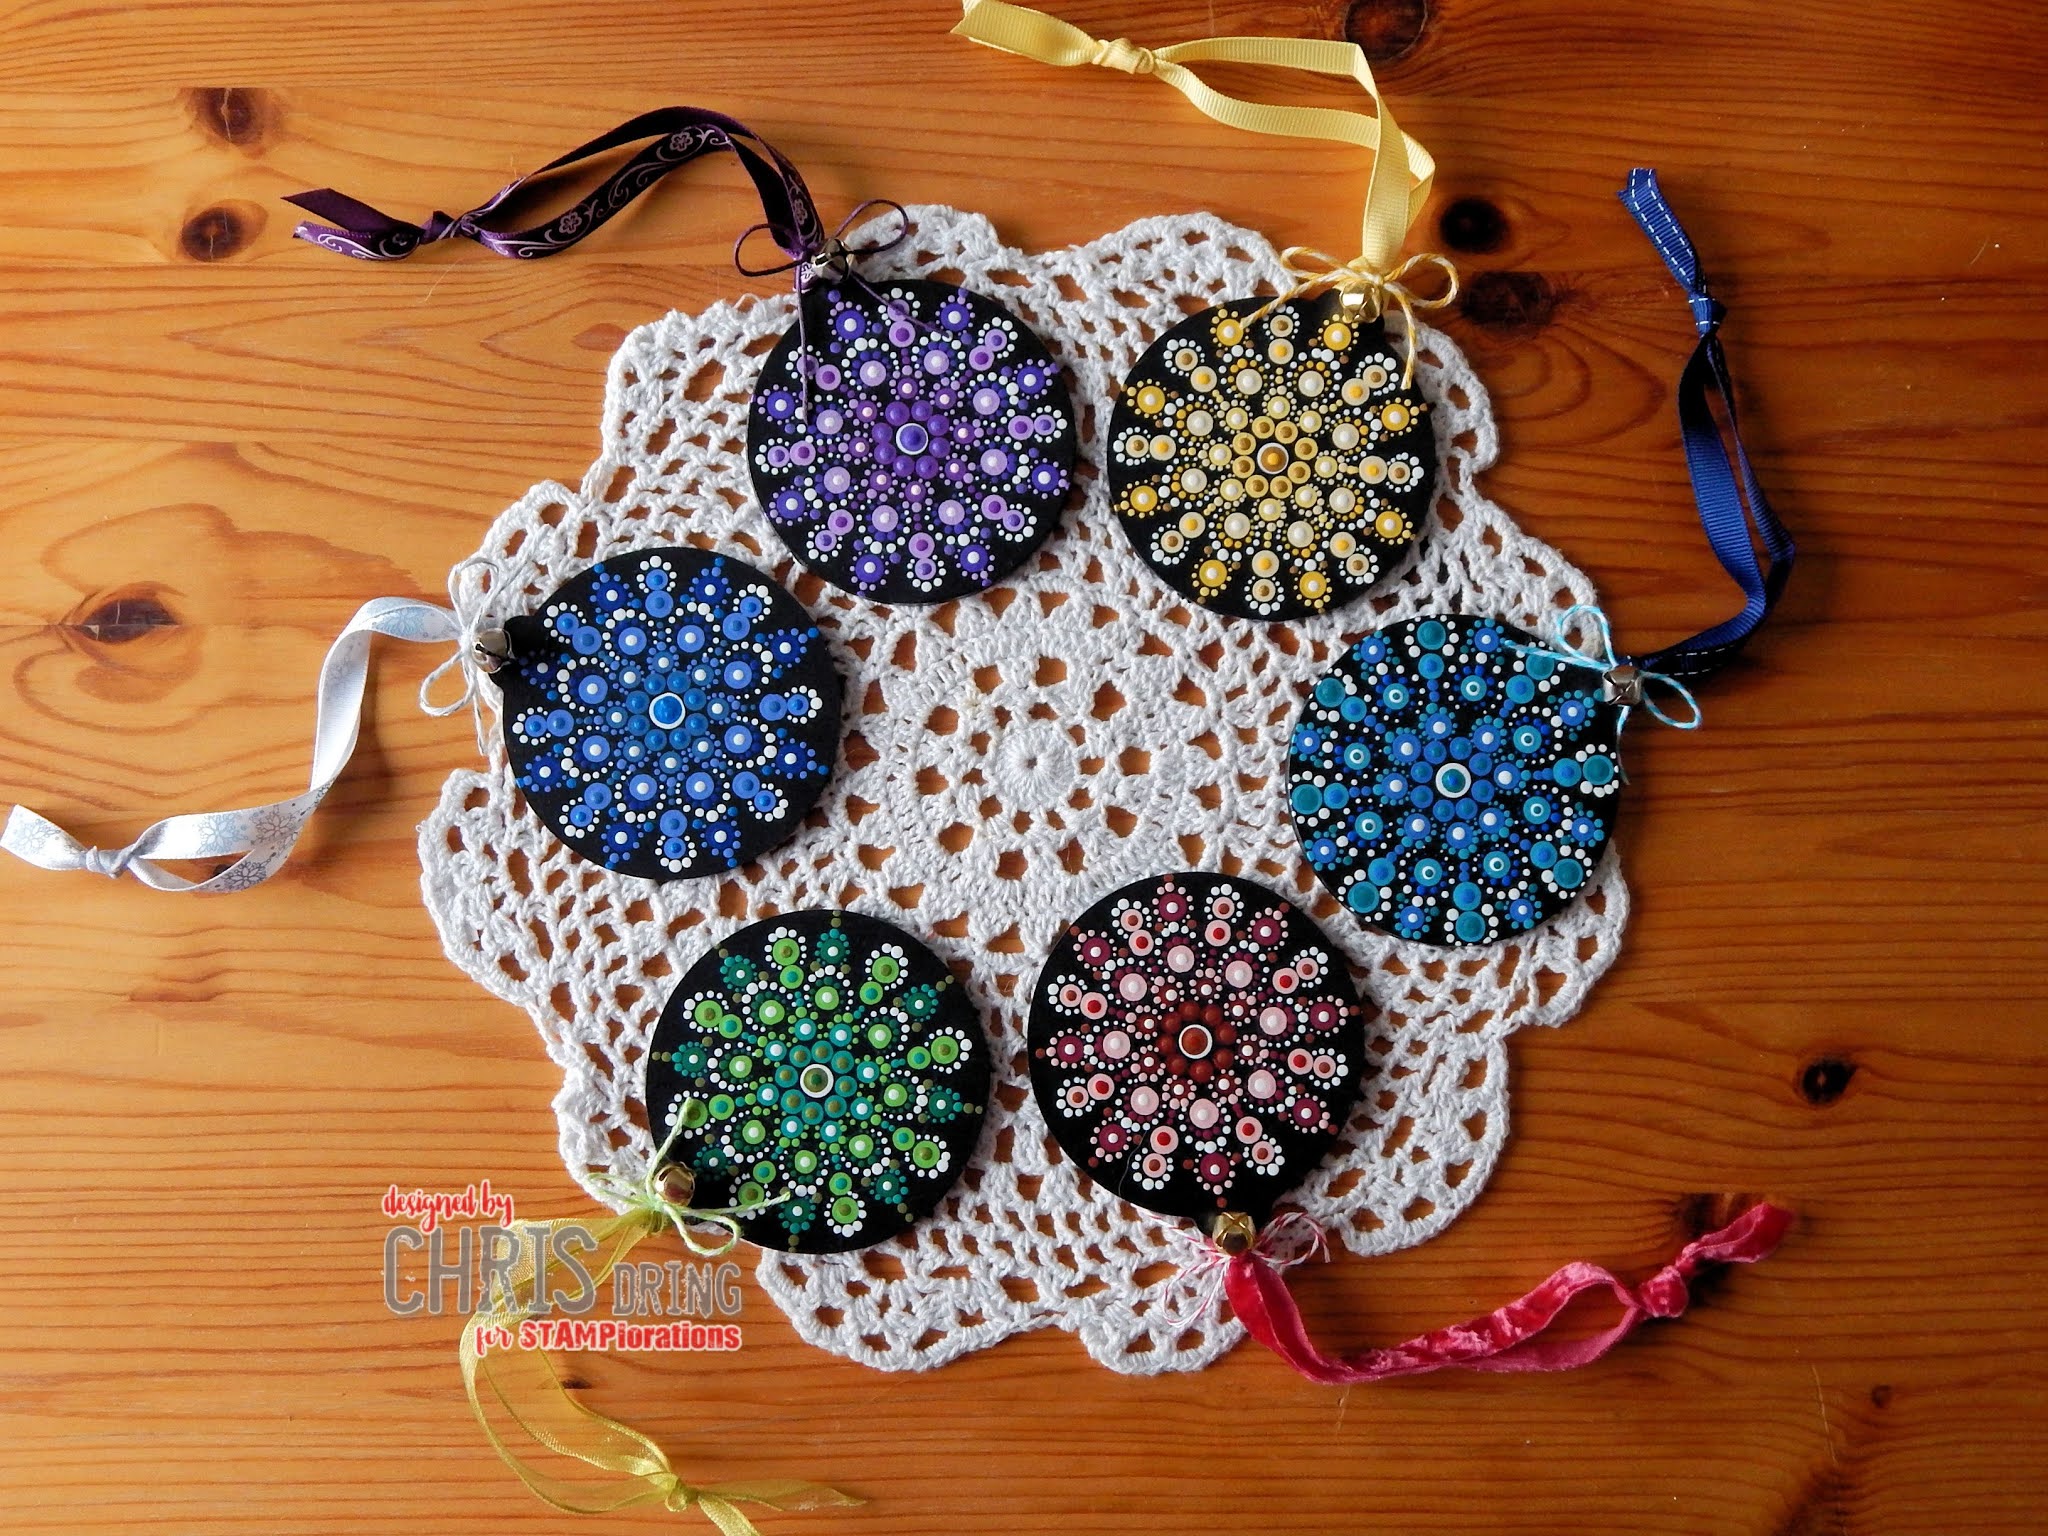
Here's what I came up with:

(This post contains affiliate links, at no additional cost to you!)

Here are some close ups:


These were pretty easy to put together. My ATC bases are from
I die cut a bunch of flowers from white card stock using
the trendy spring blooms dies. Once I had them glued down,
I grabbed some scrap card stock and adhered sentiments
from the Shine Bright clear stickers, trimmed and adhered
with foam squares. I added some enamel dots to
finish my ATCs.

I hope that you'll join us this month for our flower
challenge at A Tiny Craft (ATC) Challenge! For more inspiration,
do check out what my teammates created to WOW you!

Thanks for visiting, have a great day!


Supplies:
STAMPlorations - Mixed Media Spring ATC Ephemera, Shine Bright clear stickers, Trendy Spring Blooms dies
CS: scrap
Accessories: GC; black Spectrum Noir marker; My Mind's Eye - Enamel Dots
Adhesives: Ranger - MMM; SA by 3L - 3D foam squares


Tuesday, June 1, 2021

STAMPlorations June Theme & Photo Prompt Challenge!


 This post contains affiliate links. When you click on any of the STAMPloration store links below, and place an order, 
I will receive a small commission at no additional cost to you.)
 
Hello and welcome friends!
Happy June 1st to you all! 
I look forward to seeing how you interpret it!

For my card, I've used only the theme this time:


I started by blending green ink through the larger of the Christmas Wreaths stencil.
After rounding the corners, I felt it needed a bit more, so I stamped one of
the streamer images from the Christmas Bell Medley stamp set in the corners.
For the 'berries', I used sequins from the Blue Shimmer ShakerBlends.
I heat embossed one of the sentiments from the Christmas Baubles stamp set
to finish the front of my card.
 
I hope that you can join in and link up your project at
If you're interested in any of the STAMPlorations items I've used, or any
other of their products, please feel free to use my 
discount code for and extra 20% off, plus
a *freebie of your choice!


Thanks for visiting! Have a wonderful day!


Supplies:
Stamps: STAMPlorations - Christmas Bell Medley, Christmas Baubles
Ink: Memento - Bamboo Leaves, Nautical Blue; Versamark
CS: Nicole; TE; Bazzill
Accessories: ARTplorations - Christmas Wreaths stencil; CRAFTplorations - Blue Shimmer ShakerBlends; PFS blending brush; MISTI; Fiskars - corner rounder; Stampendous - white EP; heat gun
Adhesives: SA by 3L - tape runner, thin 3D foam squares; Ranger - MMM

Saturday, May 1, 2021

STAMPlorations May Theme & Photo Prompt Challenge!


(This post contains affiliate links. When you click on any of the STAMPloration store
 links below and place an order, I will receive a small commission at no 
additional cost to you)
 
Hello and happy May 1st!
It's a new month and that means a new
starts today at STAMPlorations!
The theme is stamps & wings, and just look at that
gorgeous inspiration photo. Love it!
 
  I combined both theme and photo prompt for my card:

I found the perfect wood grain and sheet music paper in my stash to use for my card.
Once I had them adhered to my card base, I stamped and fussy cut one of the bird
images from the Trendy Birds 2 stamp set, which was popped up on foam squares.
I used one of the stickers from the Shine Bright clear sticker pack for my sentiment.
On the inside of my card, I stamped a sentiment from the
Celebrate Big stamp set.


I hope that you are inspired to play along this month at
do check out what my teammies created to wow you!

If you happen to order from the STAMPlorations store, feel free to use my
personal discount code for an extra 20% off, and perhaps a freebie too!


Thanks for visiting. I hope that you have a wonderful day!


Supplies:
Stamps: STAMPlorations - Trendy Birds 2, Celebrate Big
Ink: Memento - Rich Cocoa
DP: Kaisercraft - Pawfect collection - wood grain; American Crafts - sheet music 
CS: Thunderbolt; TE; scrap
Accessories: CRAFTplorations - Shine Bright clear stickers; MISTI
Adhesives: SA by 3L - tape runner, thin 3D foam squares

Thursday, April 15, 2021

STAMPlorations April Theme & Photo Prompt challenge reminder


Hello and welcome!
Just popping in with a reminder about the
 
(This post contains affiliate links. If you click on any of the
STAMPlorations store links below and place an order, I will
receive a small commission at no additional cost to you.)
 
For my second project, I painted a few of the
CRAFTplorations Butterflies using the colors in the photo:

 
The raspberry butterfly is stenciled in white paint using the
 Make Marks #3 ARTplorations stencil. Once the paint dried,
I placed the stencil back on and traced around the design 
with a blue marker, to give it a fun, whimsical look:
 

On the green butterfly, I used a white Gelly Roll pen to trace the
design using the Swirly Blooms ARTplorations stencil. I dotted the 
centers of the flowers with the raspberry paint:

On the blue butterfly, I started with one wing and using the white
Gelly Roll pen, traced the design from the Christmas Wreaths
ARTplorations stencil. Then I flipped the stencil over onto the
other wing, trying to line up the design as close as possible to get
a mirror image, and traced the design. I color filled the leaves and
berries with the same green and raspberry paints:


Once the sealer was dry, I added rhinestones to the bodies for
some sparkle! I haven't decided yet if I want to add these to
a wreath, or to make them into ornaments. Decisions, decisions! 😀

You still have plenty of time to link up your projects at
I hope you play along!

In case you feel compelled to shop at STAMPlorations,
don't forget to use my discount code for an
extra 20% off and a freebie!


Thanks for visiting. I hope that you have a wonderful day!


Supplies:
CRAFTplorations - Butterflies
ARTplorations - Christmas Wreaths, Make Marks #3, Swirly Blooms
DecoArt Media Gesso
DecoArt Americana acrylic paint: Dragon Fruit, Ultra Blue Deep, Sour Apple, Titanium White
DecoArt DuraClear gloss Varnish
sponge wedge, paint brush
Sakura white Gelly Roll pen
Faber-Castell blue Artist PITT pen
David Tutera - rhinestones

Monday, April 12, 2021

Sticker Monday at STAMPlorations (part 2!)


Hey crafty friends, welcome!
I'm up on the STAMPlorations blog with my second Sticker Monday post!
Today, I'm using stickers from the Inspirational #5 sticker pack.

(This post contains affiliate links. When you click on any of the STAMPlorations store links below and place an order,
 I will receive a small commission at no additional cost to you.) 

I had an idea to use some of the cover plate dies as a stencil to create a second
set of cards. Let me show you what I mean. 
For my first card, I've used the Dragonfly cover plate die:

After die cutting, I placed another piece of white card stock under it and 
carefully pounced various Distress Inks over it, making sure that I got ink
in the cut out areas.
 

Here's the finished card using the die cut panel:


For my second card, I used the Butterfly cover plate die in the same way
but using different Distress Inks:


On my last card, I've used the Bloomtangled #1 cover plate die. 
This time, I pounced Distress Oxides, to change it up. LOL!


The finished card using the die cut:

On these three cards, I've added sequins from the Color Confetti ShakerBlends.
So, what about those "stenciled" panels? Here are the cards I've
created, using stickers from the Inspirational #4 package:


These are just a couple of fun ways to add stickers to your projects.
 
I'd love to hear what you think. Don't forget to leave a comment below and
on the STAMPlorations Sticker Monday post for a chance at a $15 prize code.
Every month, they randomly draw 7 winners from all the posts published during 
the month. So the more posts you comment on, the more chances you have to win!
 
I hope that you have a great day, thanks for visiting!


Supplies:
Ink: Ranger DI - Picked Raspberry, Blueprint Sketch, Lucky Clover (dragonfly), Squeezed Lemonade, Ripe Persimmon, Candied Apple, Tumbled Glass (butterfly), Ranger DO - Twisted Citron, Peacock Feathers, Spiced Marmalade, Picked Raspberry, Salty Ocean (bloomtangle)
CS: Neenah; Cardstock Warehouse
Accessories: GC; CUTplorations - Dragonfly, Butterfly, Bloomtangled #1 cover plates; Inspirational #4 & #5 Clear Stickers, Color Confetti ShakerBlends; blending daubers
Adhesives: Ranger - MMM; SA by 3L - tape runner, thin 3D foam squares

Thursday, April 1, 2021

STAMPlorations April Theme & Photo Prompt Challenge!


Hello crafty friends, and welcome. Wow, it's already April! 
I love this time of year, with all the flowers blooming and the
trees leafing out. Love this warmer weather!
Since it's the first of the month, it's time for the new
I used the photo as inspiration and used the
colors on my card: 
 
(This post contains affiliate links. When you click on any of the STAMPlorations
store links below and place an order, I will receive a small commission
at no cost to you.)


For the background panel, I blended a few Distress inks over the
Burst Slimline Stencil. Using one of the stickers in the
Birthday Word Art clear stickers, I stuck it onto a piece of white
card stock, then used a few coordinating Spectrum Noir markers
to color it. (Yes! You can color the stickers!) I trimmed it up and added
a black matte under it before adhering to the card base.
Super fun and easy!
 
 I hope that you'll link up a project at 
to seeing how you interpret them!

If you have an urge to purchase anything at the STAMPlorations store,
feel free to use my discount code for an extra 20% off and
a free item of your choice!


Thanks for visiting, and I hope you have a lovely day!


Supplies:
CS: Neenah; TE
Accessories: ARTplorations - Burst Slimline Stencil; PFS - blending brushes; CRAFTplorations - Birthday Word Art Clear Stickers; Spectrum Noir markers - AG3, TB5, BP6; 
Ink: Ranger DI - Picked Raspberry, Blueprint Sketch, Mowed Lawn
Adhesives: SA by 3L - tape runner, 3D foam squares


Tuesday, December 1, 2020

It's the December Theme & Photo Prompt Challenge at STAMPlorations!


Happy first day of December! (Hopefully it will woosh by

so that 2021 can bring a much better year for us all!)

But, since we are not quite there yet, at least we have the 

new Theme & Photo Prompt Challenge at STAMPlorations!

Use the theme, or the photo, or go all out and combine both.

It's up to you!

For my project, I've used mostly just the theme, but I did

incorporate some stars into my ornaments. 😀

 [This post contains affiliate links. When you click on the STAMPlorations store link below and place an order, I will receive a small commission at no extra cost to you.]
 

I've used the CRAFTplorations Christmas Bauble #1

 and painted not one, but six dotted mandala ornaments!

On the back side, I've stamped a sentiment and star image from

the Christmas Baubles stamp set.

I used shimmery metallic paints to color fill all the stars.


Here are some close up pictures:


It's really hard to see, but I've also used the metallic paints on 

the mandalas too. Shimmer!

There's an ongoing deal going on at the 

STAMPlorations store: 


 Just click on the link above the graphic to take advantage of this awesome promo!


 I hope that you find time this month to play along in the
 
 
I'm looking forward to seeing what you link up in the gallery!
 
Thanks for visiting! Have a great day!


Supplies:
Stamps: Christmas Baubles
Ink: Staz On - Cotton White
Accessories: CRAFTplorations - Christmas Bauble #1 3MM MDF; DecoArt Americana and Dazzling Metallics acrylic paints; The Dotting Center - dotting template and tools; paintbrush; DecoArt DuraClear satin varnish; Ribbon - May Arts, Little Yellow Bicycle, Michaels, Joanne's; Twine - Doodlebug, American Crafts, Martha Stewart, MME, Darice; Bells - Darice; Fray Check 


adding pinterest script 3. Changing the Position of the Pin it! button The cool thing about this code is that you have some freedom over where the Pinterest button for Blogger will go over the image. Take a look at the code that you just copied and pasted into the HTML for the word 'center'.