Saturday, June 24, 2023

SISTERHOOD OF SNARKY STAMPERS #237 O is for Ombre


 Hello snarky peeps and welcome!
It's time once again for the new challenge at the
This fortnight is brought to you by the letter O:
as in OMBRE!
Here's the card I created:


The main panel was water colored using turquoise Magenta
Nuance powder dye. That stuff is so versatile to use!
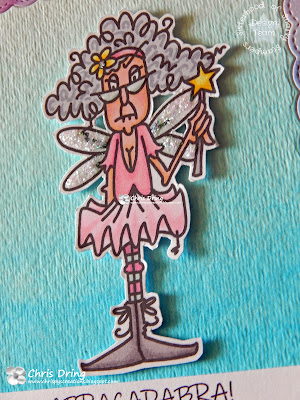
Stella's wings received a coating of crystal Stickles and her
glasses a coating of DecoArt Media liquid glass.
The sentiment was computer generated.


and the inside:


I hope that you'll join us for our Ombre challenge at the
For more ideas, do check out what my sisters and our
reigning Queen, Beverly, have created for your enjoyment.
Thanks for visiting, and I hope you have a great day!


Supplies:
Stamps: Bugaboo digi stamps - Stella Fairyvisit; Stampendous - Gnome Sayings
Ink: Memento - tuxedo black
DP: Craft Consortium - Ink Drops Vivid
CS: Spectrum Noir; Strathmore water color paper; Neenah
Accessories: Spectrum Noir markers; computer & printer; Sunny Studio - Fancy Frames Rectangles; Ranger - Crystal Stickles; DecoArt Media - Liquid Glass; Magenta Nuance turquoise powder dye; paintbrush & water 
Adhesives: Bearly Art glue; SA - tape runner, thin 3D foam squares


Thursday, June 15, 2023

Tropical hello

 Hello and welcome crafty friends.
I've got a card to share:


I die cut the flamingo from a fushia panel I made with Magenta
Nuance powder dye spritzed with water. I found that snippet of
pretty yellow-green/blue paper in my stash and thought it
would make a nice contrast for my flamingo. I was thrilled to find
that pink strip of paper matched the pink of the bird. 😊


I used a few markers to color the beak for a more realistic look.
I'm really liking how this one came out!

That's it for now. Thank you very much for visiting!
I hope that you have a great rest of your day!


I'd like to enter this at:


Supplies:
Stamps: Waffle Flower - Sweet Sentiments
Ink: Memento - Tuxedo Black
DP: mystery green/blue snippet; DCWV - Summer Magic
CS: Strathmore mixed media paper; Thunderbolt; Cardstock Warehouse
Accessories: Spellbinders - Flamingo die; Sunny Studio - Slimline basic borders die; Magenta Nuance powder dye; white Gelly Roll pen; black Faber-Castell PITT Artist pen; Smooch Sundance ink; MISTI
Adhesives: SA - tape runner, thin 3D foam squares; Bearly Art glue


Sunday, June 11, 2023

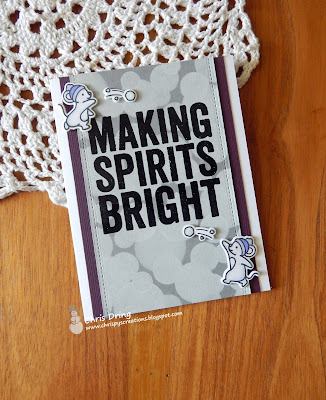
Making Spirits Bright

 Hello and welcome crafty friends!
I have a card to share with you
that I was going to link up
a color challenge, but of course,
I didn't pay attention to when it
ended, so I missed it. Grrrr!
Anyhoo, here's what I came up with:


I even tried making a bokeh backgroud to mimic the graphic.
IRL, the circles don't look so undefined, but that's
just my crack photography skills at work here. LOL!


Here's the inside of my card:


One more Christmas card made for the year. Yay!
That's all for now. Thank you for stopping by!
Have a good day!


I'd like to enter this at:


Supplies:
Stamps: Lawn Fawn - Snowball Fight, Ho Ho Holidays; Stampers Anonymous/TH - Bold Tidings
Ink: Memento - Tuxedo Black; Versamark; Colorbox/Susan K. Weckesser - Snow
CS: Spectrum Noir; Recollections; Neenah
Accessories: MISTI; Spectrum Noir markers; handmade circle stencil; Sunny Studio - Slimline basic border die; Lawn Fawn - Snowball Fight dies; Inkadinkado - black EP; heat gun; Nuvo - white blizzard Glitter Drops
Adhesives: SA - tape runner, thin 3D foam squares


Saturday, June 10, 2023

SISTERHOOD OF SNARKY STAMPERS #236 C is for Critters


Hello snarky peeps and welcome!
We have a new challenge starting at the
C for Critters!

I had a idea of what I wanted to do for this challenge,
and I love how it turned out, but in hindsight,
I'm not sure if sea turtles are considered 'critters'.
Oh well, I'm sticking with it:


Not so much in snark, but punny is just fine too!

I hope that you'll join us in our Critter challenge at the
For more inspiration, do yourself a favor and check out
what my sisters and our reigning Queen, Deanne have
created for you!
Thanks for visiting. I hope that you have a great day!


Supplies:
Stamps: Paper Smooches - Courteous Cuties
Ink: Memento - Tuxedo Black
CS: Strathmore mixed media; Neenah; Spectrum Noir; Cardstock Warehouse
Accessories: Spectrum Noir markers; Paper Smooches - Courteous Cuties dies; MFT - Single Stitch Line Oval Frame; Taylored Expressions - Frayed Edge die; Magenta Nuance powder dye turquoise; mister; MISTI; Stampendous - white EP; heat gun
Adhesives: SA by 3L - tape runner, thin 3D foam squares; Bearly Art glue

Thursday, June 1, 2023

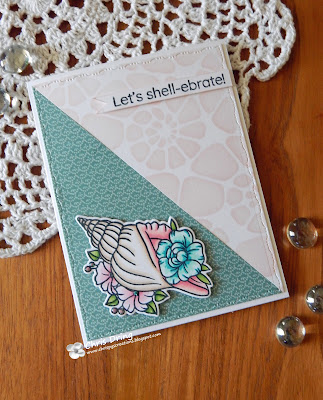
Let's Shell-ebrate!

 Hello and welcome, crafty friends!
I took some time to do some organizing in
my craft room. Mostly, reorganizing my 
extensive collection of die cuts. I store mine in ArtBins.
I'm now up to 9 bins, and mostly already full of dies.
I may have a hoarding problem. LOL!
While putting things away and straightening up,
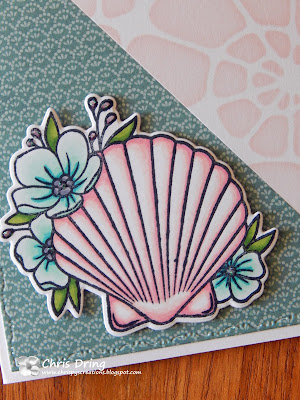
one of the new-to-me stamp and die sets,
Floral Shells by Pink & Main,
bellowed to me to be used for the first time.
These are some gorgeous images of shells
that have various flowers in and around them.
I experimented with only using two colors of markers
and the colorless blender to color them.
I love how they look like they are glowing!
Here are two cards I made with two of the images:


Here's the finished inside:

The nautilus stencil is new and also the first time used.
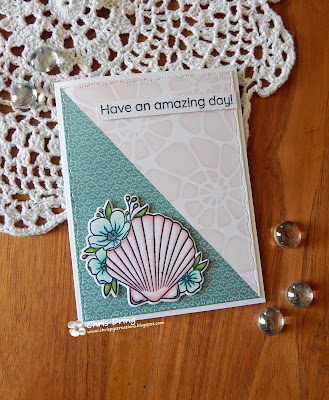
I just stacked both panels, cut on an angle and had four
half pieces to work with.

Here's the other card I made with the two other panels:


The finishing touch was to add some glitter glue to
the flowers for a bit of sparkle.

Now, to create cards using the last two images!
Thanks for visiting. I hope that you have a great day!


I'd like to enter this at:


Supplies
Stamps: Pink & Main - Floral Shells; Honey Bee Stamps - Inside Birthday
Ink: Memento - Tuxedo Black; Altenew - Blush
DP: Basic Grey - South Pacific
CS: Spectrum Noir; Neenah
Accessories: Spectrum Noir markers; Pink & Main - Floral Shells dies, Nautilus stencil; Penny Black - Elegant Stitching rectangle die; MISTI; Taylored Expressions - blending brush; Nuvo Glitter Drops - White Blizzard
Adhesives: SA by 3L - tape runner, thin 3D foam squares


adding pinterest script 3. Changing the Position of the Pin it! button The cool thing about this code is that you have some freedom over where the Pinterest button for Blogger will go over the image. Take a look at the code that you just copied and pasted into the HTML for the word 'center'.