Hello and happy hump day!
I was playing around with a new to me stamp set
using different color combinations for the layered
plumeria flower.
This is what came about:
and the inside:
I don't have a gazillion different ink colors so I was just using what I
had on hand. Of all the different images on this card, I really
like how the monstera palm leaf came out the best. LOL!
Are any of these lined up perfectly? Nope, but they are close
enough in my book, so they were fussy cut and arranged.
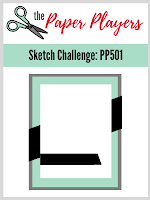
My design is based off the Paper Players #501 sketch.
Thanks for visiting. I hope you have a great day!
Supplies:
Stamps: Sunny Studio - Radiant Plumeria, Summer Sweets; MFT - Birthday Greetings
Ink: Memento - Lulu Lavender/Lilac Posies/Dandelion/Tangelo, Angel Pink/Rose Bud/Lemon Chiffon (Simon Says Stamp)/Cantaloupe/Lady Bug, Pear Tart, Cottage Ivy, Northern Pine, Bamboo Leaves, Bahama Blue; VersaMark
DP: Pebbles - Garden Party
CS: Neenah; TE; Thunderbolt
Accessories: GC; Cuttlebug - Oxford EF; MME - enamel dots; MISTI; Stampendous - white EP;
heat gun; WOS pen
Adhesives: SA by 3L - tape runner, 3D & thin 3D foam squares


I am glad you were able to put "fun" and "layering stamps" together in the same sentence! (See my post tomorrow, lol.) What a pretty card!!!
ReplyDeleteVery pretty - the blooms completely 'pop' on that blue background!
ReplyDeleteChris, this is so pretty! I love those gorgeous blooms and the way they pop off your background! The rainbow paper is just perfect, too! SO happy you joined us at The Paper Players this week!
ReplyDeleteYour tropical blooms look fabulous against the blue textured background. Thanks for sharing with us over at The Paper Players this week!
ReplyDeleteAbsolutely gorgeous color combo and I love the fab color in those tropical blooms. Thank you so much for joining us this week over at The Paper Players!
ReplyDelete